OpenAI API Account: Create an Account / Sign Up / Login + Generate an API Key
If you want to use the OpenAI API (for example with Chaterimo BYOK), you’ll need to create an OpenAI API account (sign up), log in to the OpenAI Platform dashboard, set up billing, and then generate an API key.
This guide is focused on the developer product (OpenAI API / Platform), not ChatGPT Plus. In ~10 minutes you’ll have a working account + key you can paste into Chaterimo.
🛍️ Using OpenAI for Shopify AI customer service (BYOK)
If your goal is Shopify AI chat (AI chatbot for Shopify customer service), you can use this OpenAI API key with Chaterimo (BYOK) and automate the highest-ROI workflows first (WISMO/order status, returns, product Q&A). Start here:
Shopify AI customer service (pillar guide) · Best AI chatbot for Shopify · Best live chat for Shopify · Gorgias alternative · Tidio alternative
Using this OpenAI API key for Shopify AI customer service? Start here: Shopify AI customer service · Best AI chatbot for Shopify · Best live chat for Shopify · Gorgias alternative · Tidio alternative
Our service, Chaterimo, directly connects with OpenAI's advanced language models to provide high-quality chatbot services. Integrating your OpenAI API key allows us to create a direct link to OpenAI's servers, ensuring fair billing according to actual usage and avoiding connection speed limits, known as rate limits. This means that with your own API key, you pay directly to OpenAI for the exact number of AI-generated responses, ensuring that your costs accurately reflect your usage.
It’s important to emphasize that Chaterimo charges a separate monthly fee for access to advanced features, tools, and services that extend the basic capabilities of OpenAI's language models. These features include third-party integration options, dynamic content loading, and advanced conversation reporting.
Your API key is securely stored with us, hashed, and used exclusively for communication with OpenAI servers. Security and protection of your data are our priorities; therefore, we do not use your key for any other purposes and do not share it with third parties.
In the following sections, we provide a detailed guide on how to create an account with OpenAI, obtain an API key, and successfully link it with your Chaterimo account. You will also learn about the pricing models of both OpenAI and Chaterimo, so you can choose the most suitable option for your needs.
1) Create an OpenAI API account (sign up / login)
Starting to use advanced AI capabilities for your chatbot through Chaterimo begins with creating an account at OpenAI. This process is straightforward and quick, giving you access to the latest AI models, including GPT-4. Here is a step-by-step guide on how to register:
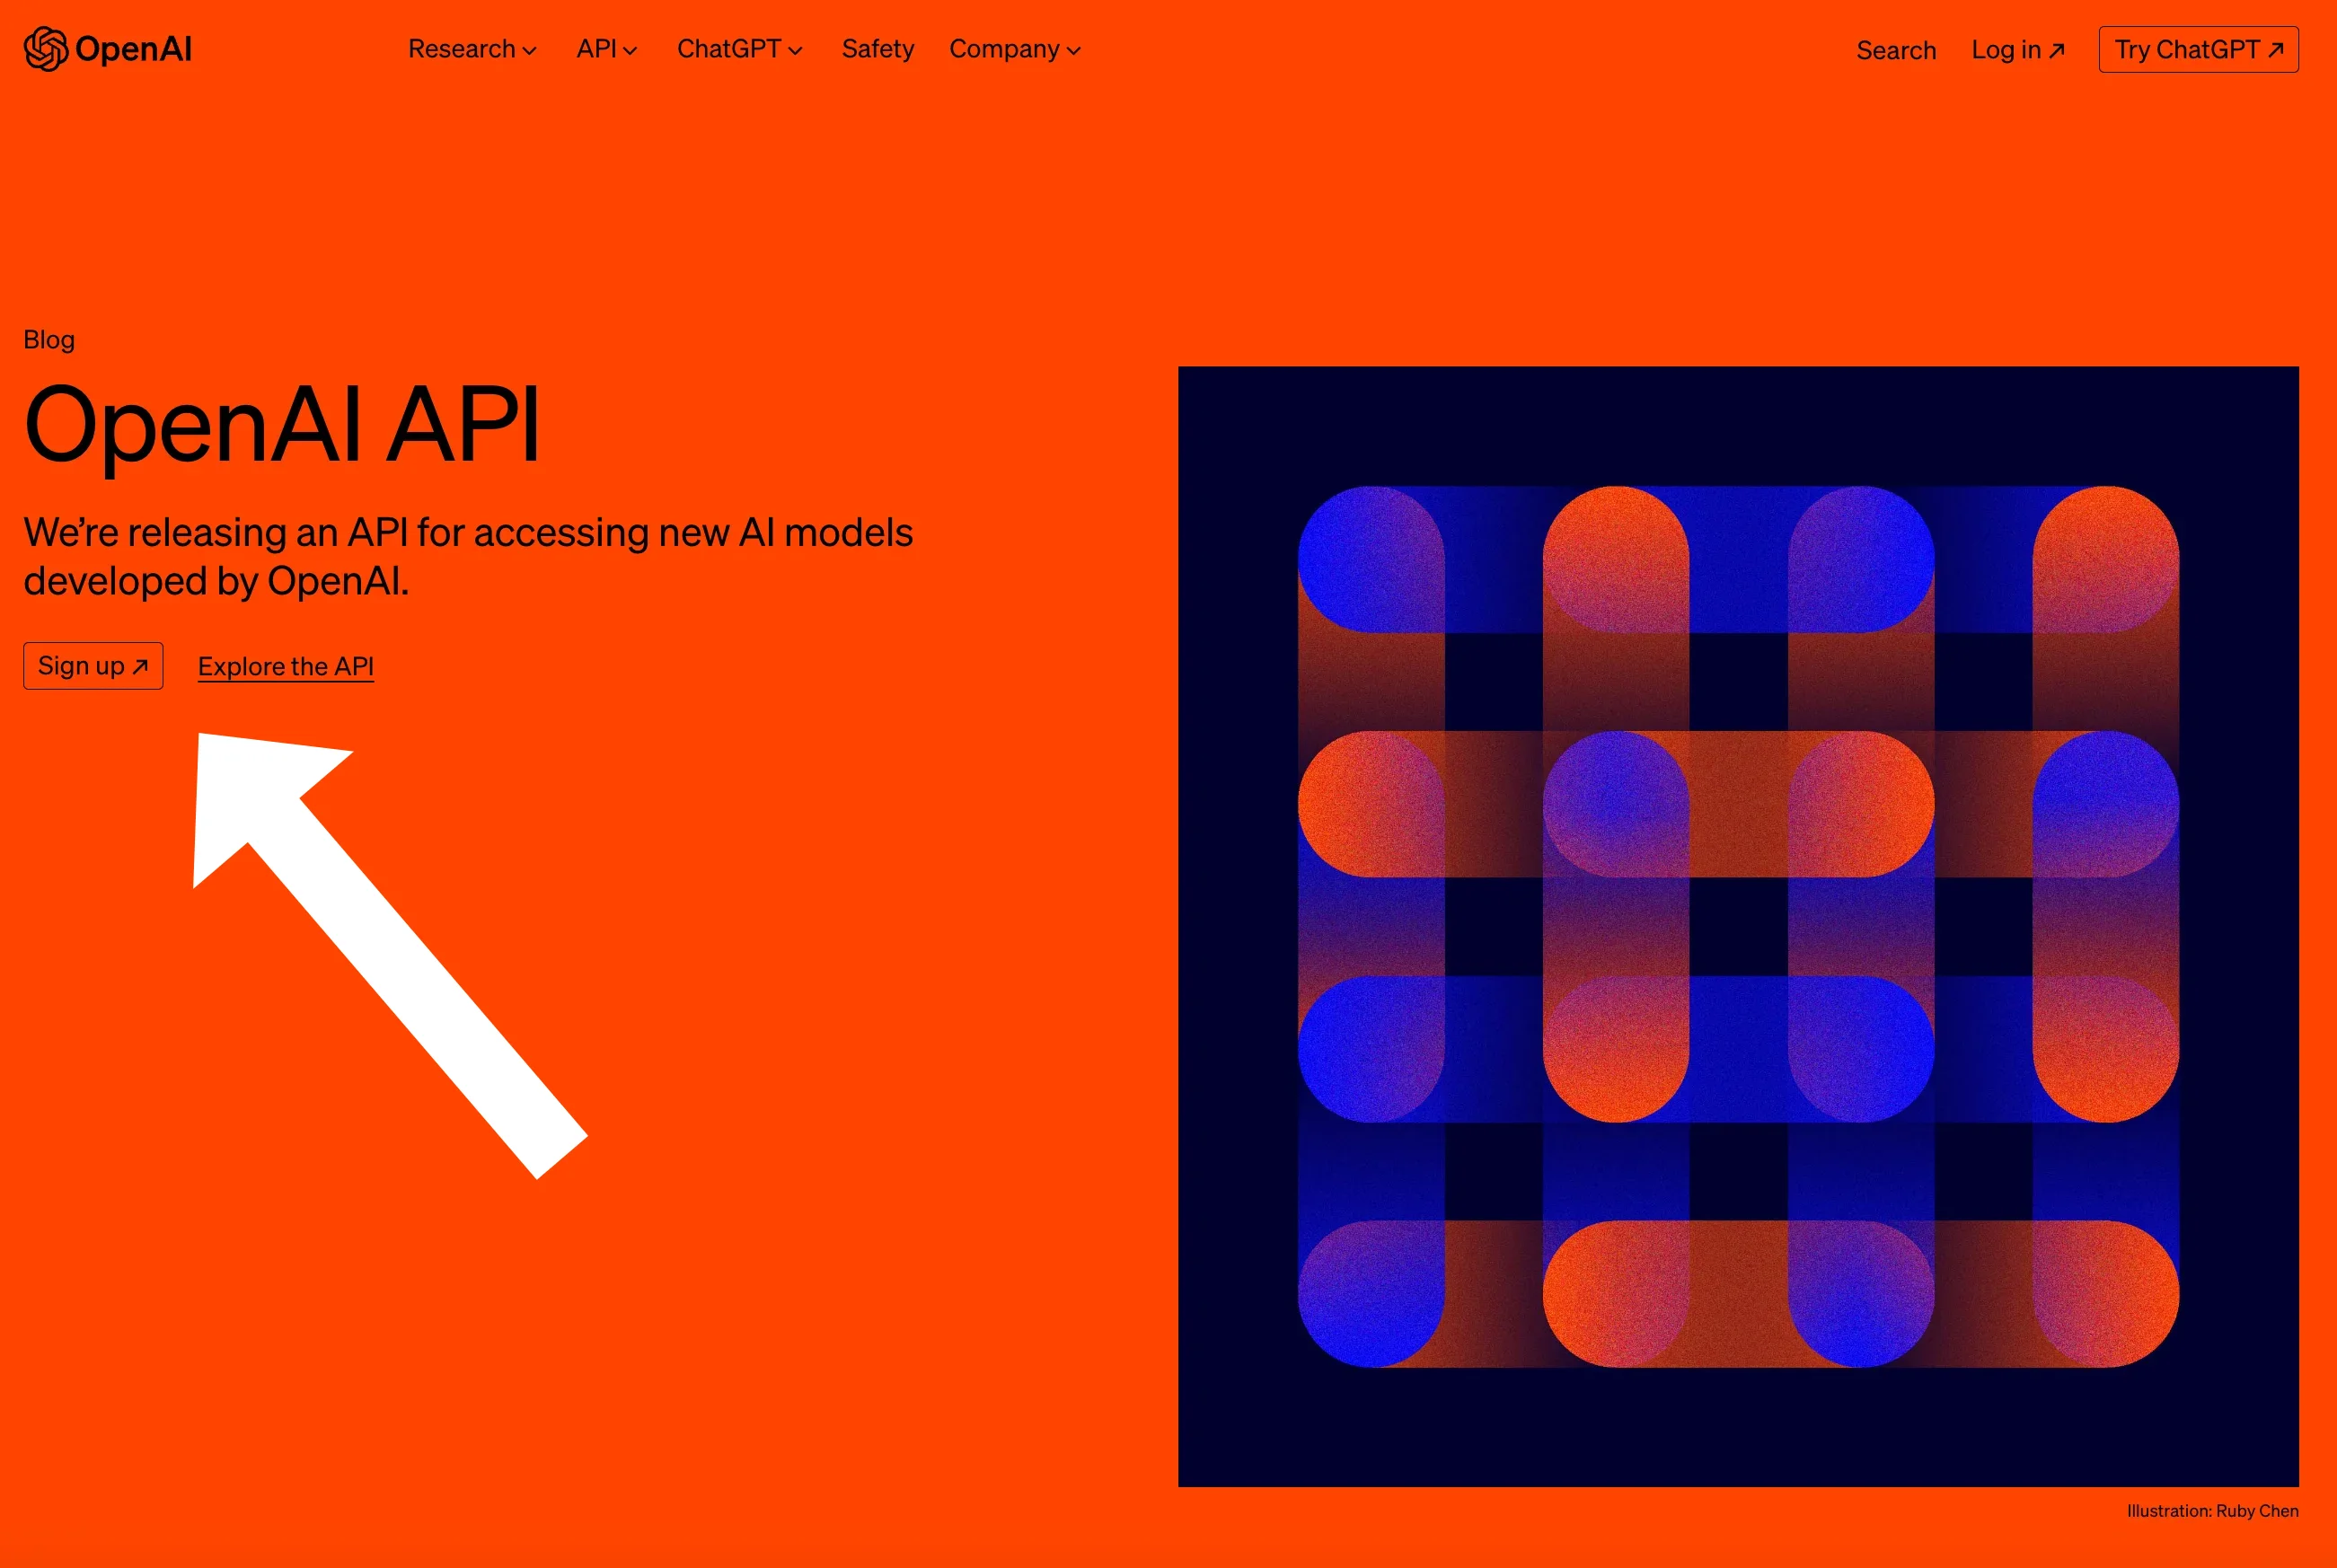
- Visit the OpenAI website: Start by opening the official OpenAI site. Here you will find information about the API and the option to create an account (the 'Sign up' button).
- Distinguishing between ChatGPT Plus and OpenAI API: It's important to distinguish between ChatGPT Plus, which is a premium version of ChatGPT with priority access and additional benefits, and OpenAI API, which provides access to more powerful and flexible AI models. For integration with Chaterimo, you need the OpenAI API.
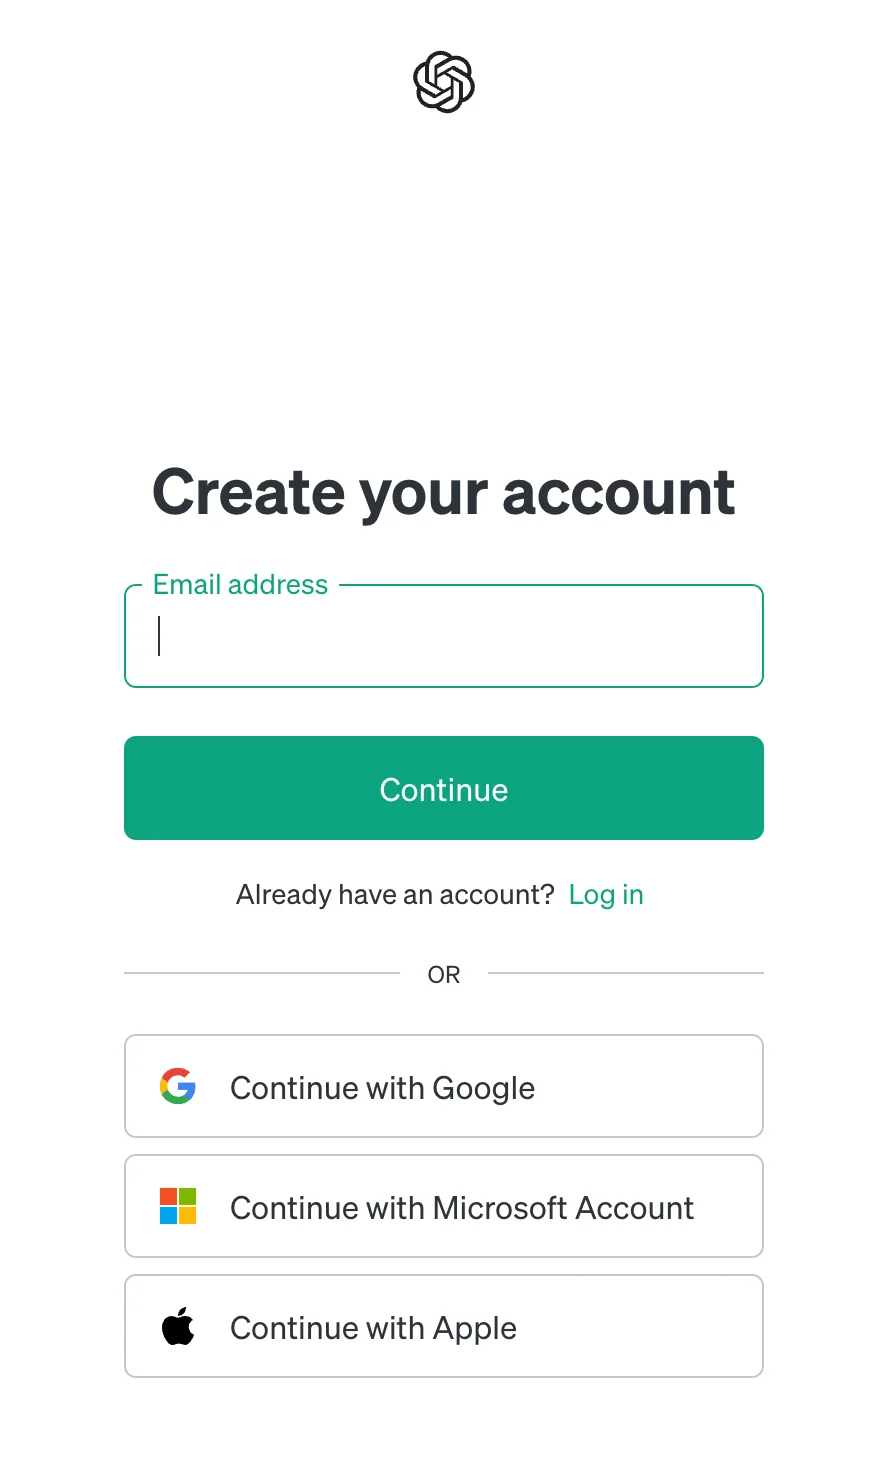
- Choosing a registration method: OpenAI offers several ways to create an account: via Gmail, Microsoft, Apple account, or using your own email. If you choose to register through Gmail, Microsoft, or Apple, the process will be quicker due to existing verification. If using your own email, you will have to go through a standard verification process, including confirming that you are not a robot and verifying your email.
- Completing registration and logging in: After filling in the required information and completing the verification process, you can log into your newly created account. Upon logging in, you will be redirected to the OpenAI API homepage, where you can start setting up your API key.
2) Entering Payment Details into OpenAI:
After successfully registering with OpenAI, the next key step is to enter your payment details. This process is essential for your API key to be fully active and functional. Follow these steps to enter payment details and create an API key:
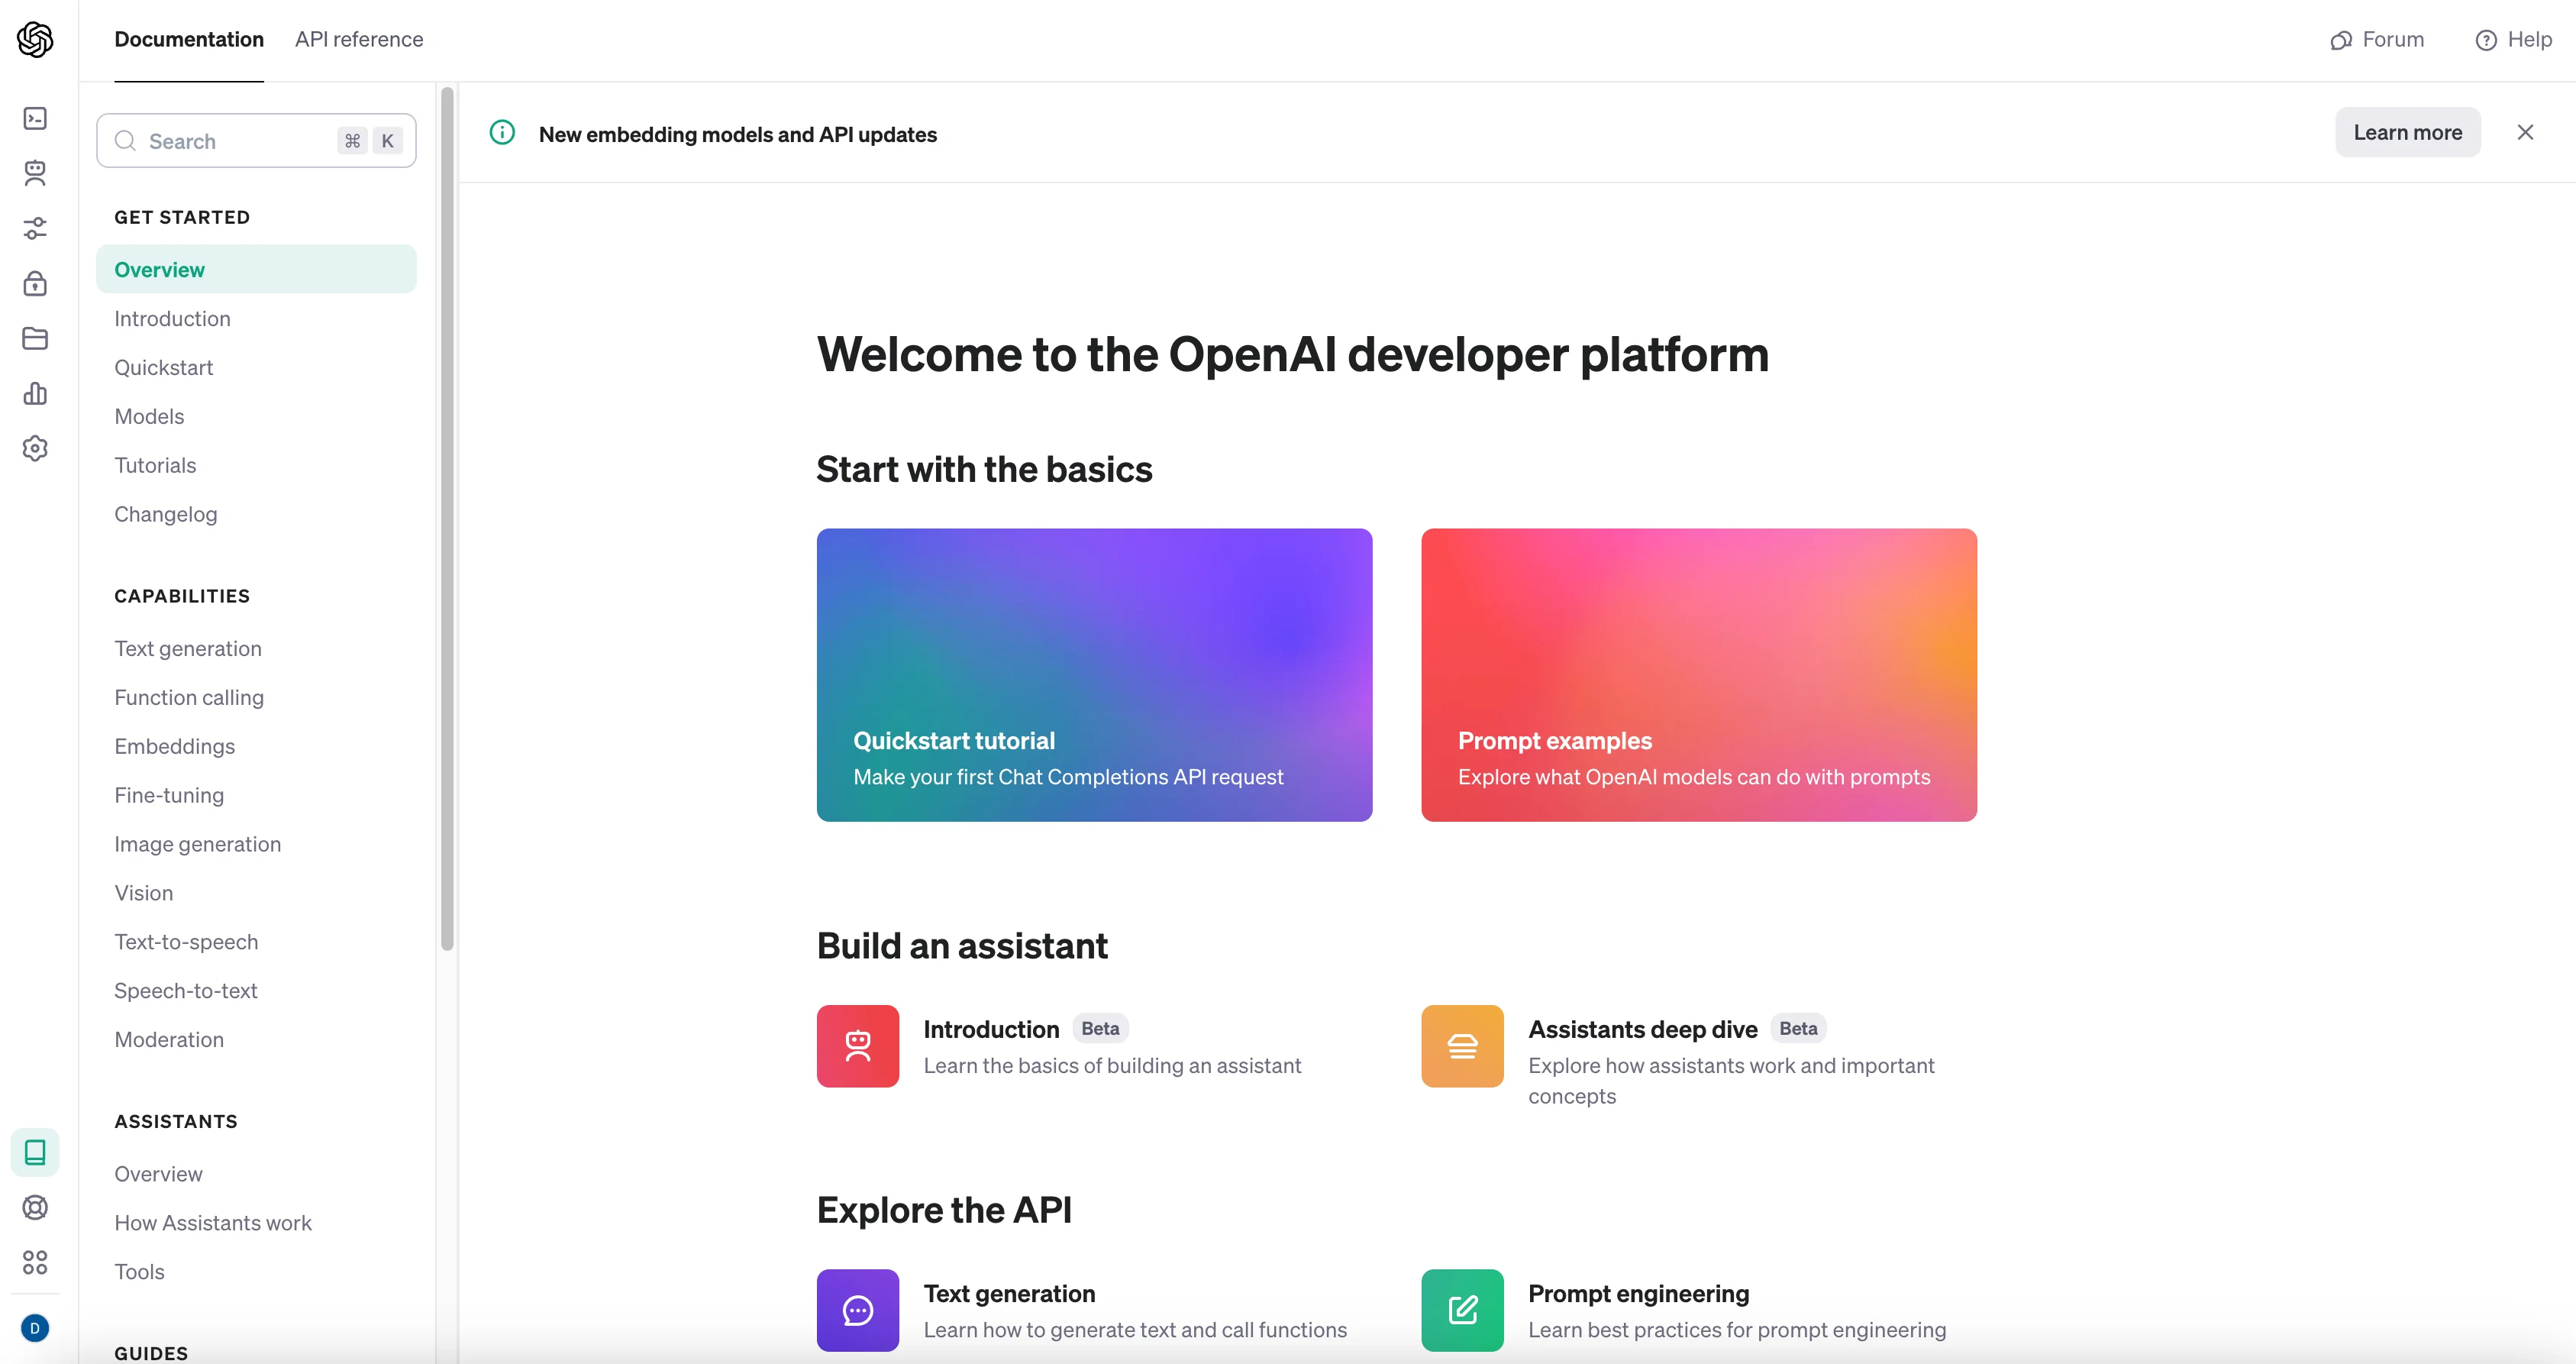
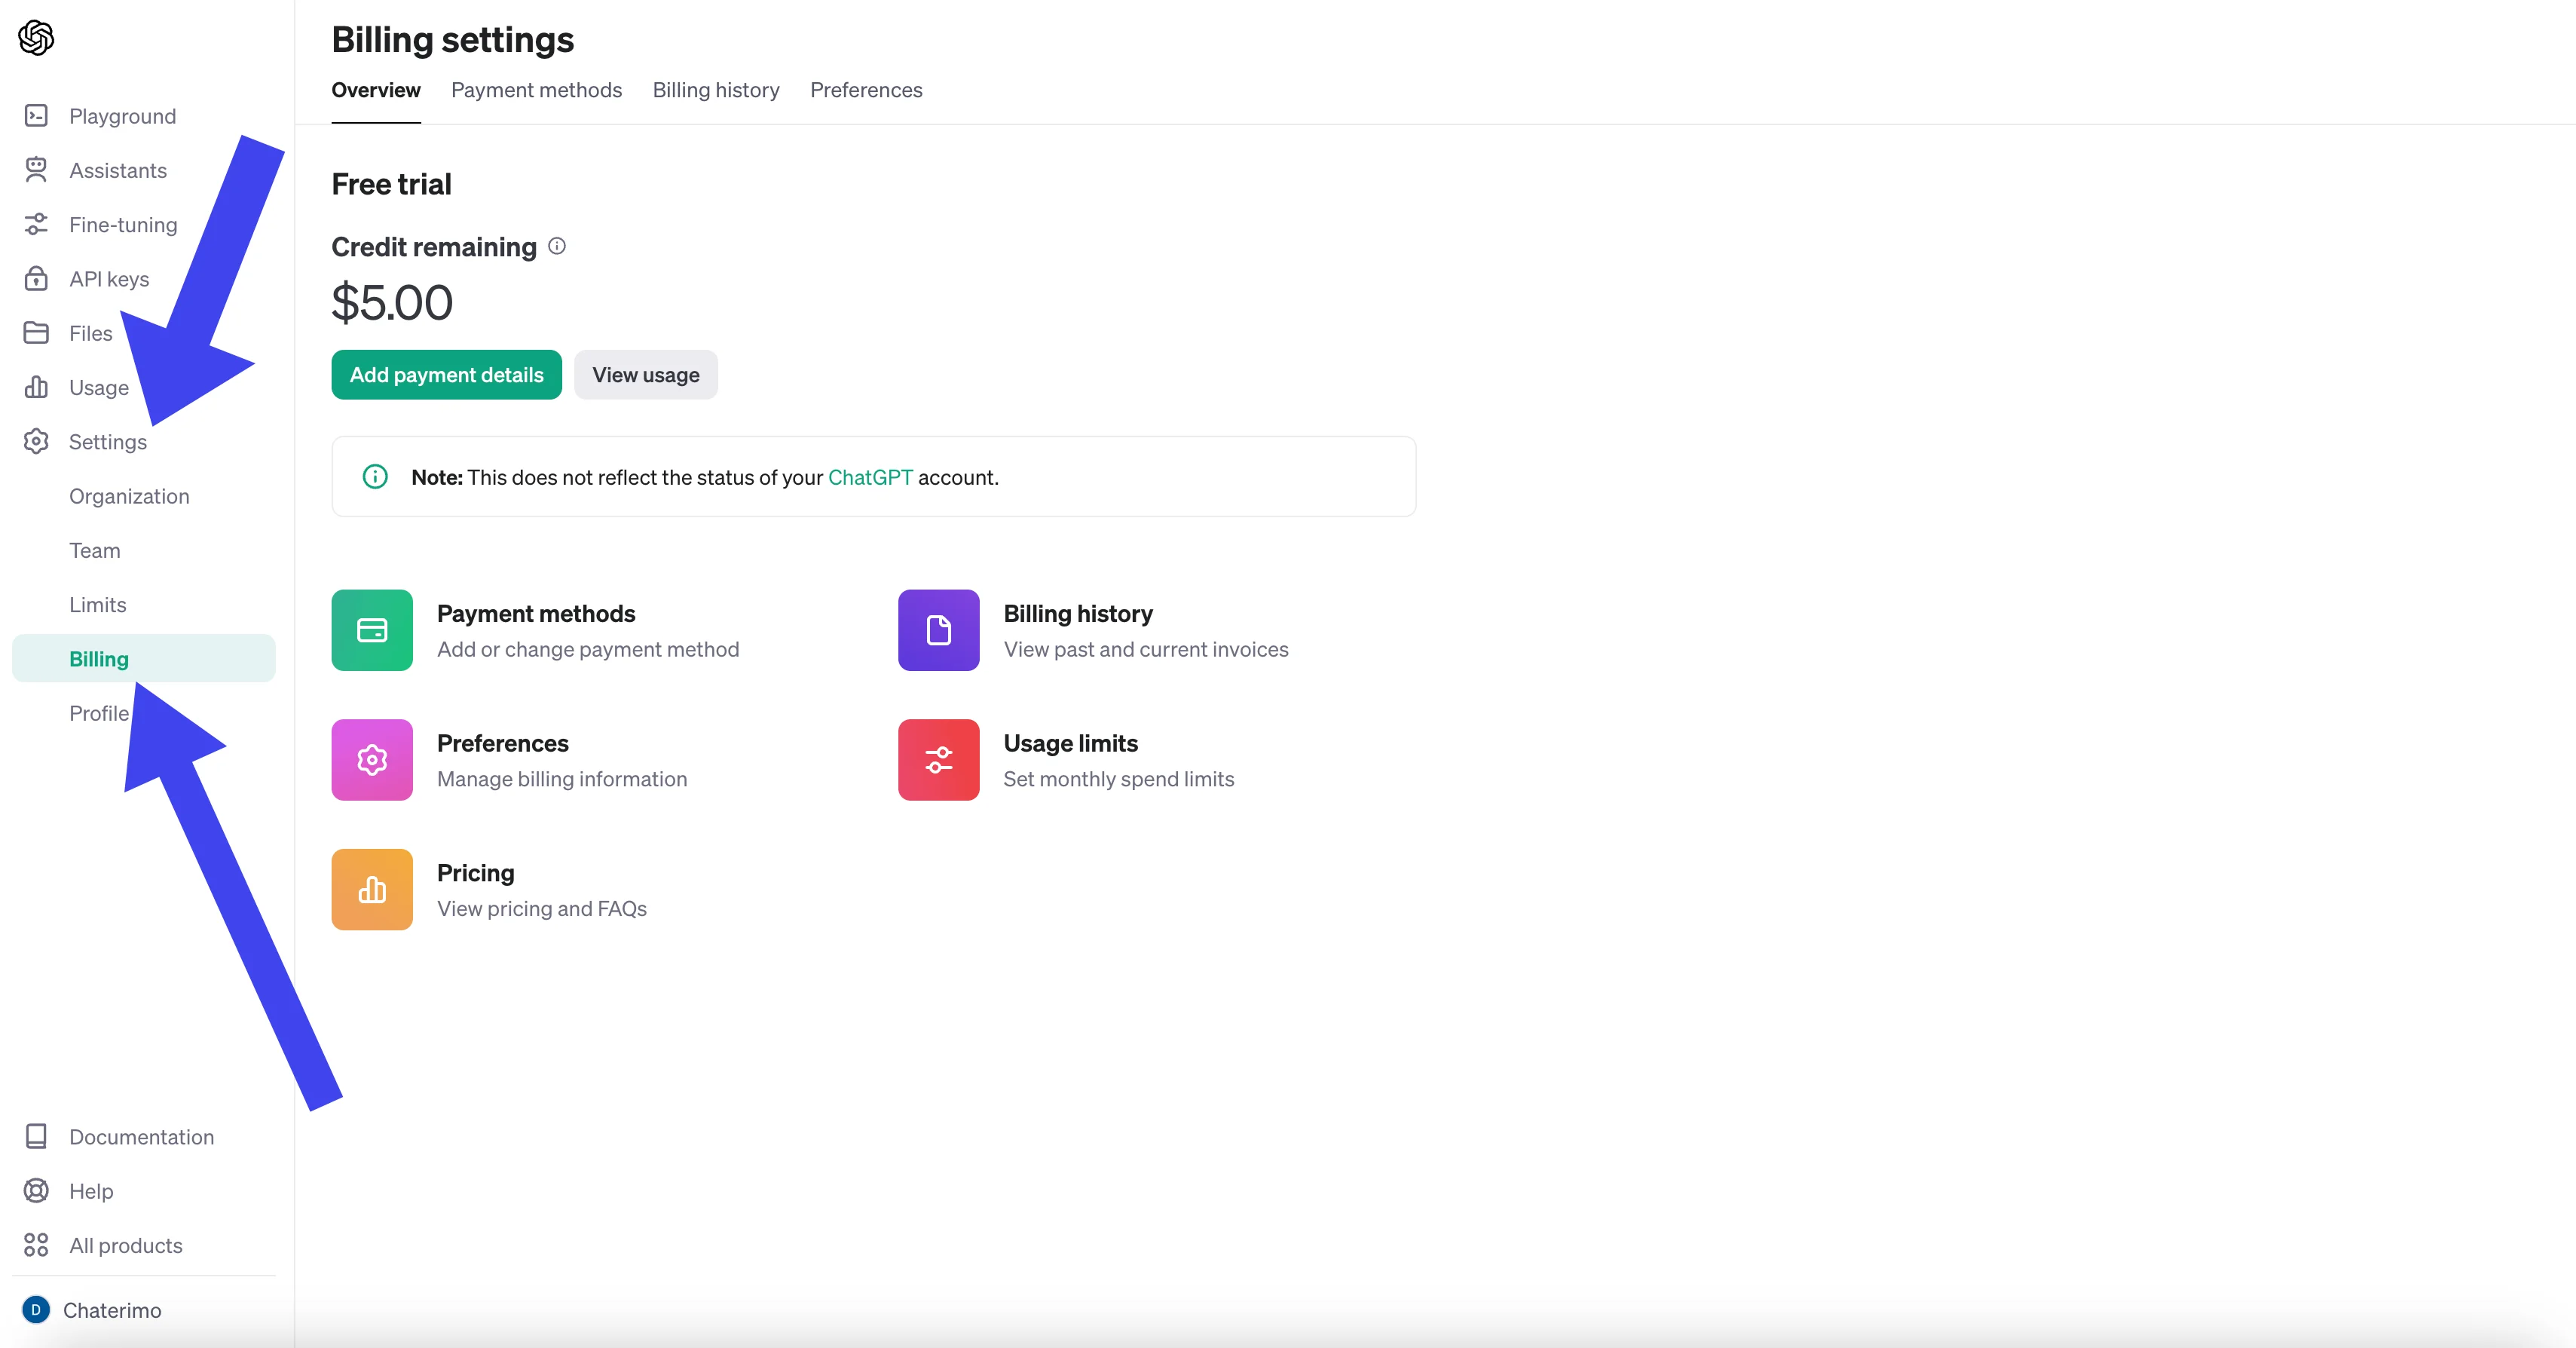
- Go to account settings: In the left navigation menu, go to the Settings section. Here you will find various account setting options.
- Enter the billing section: In the "Settings" section, find and click on Billing or visit Billing Overview directly. This section allows you to manage your payment methods and credit balance.
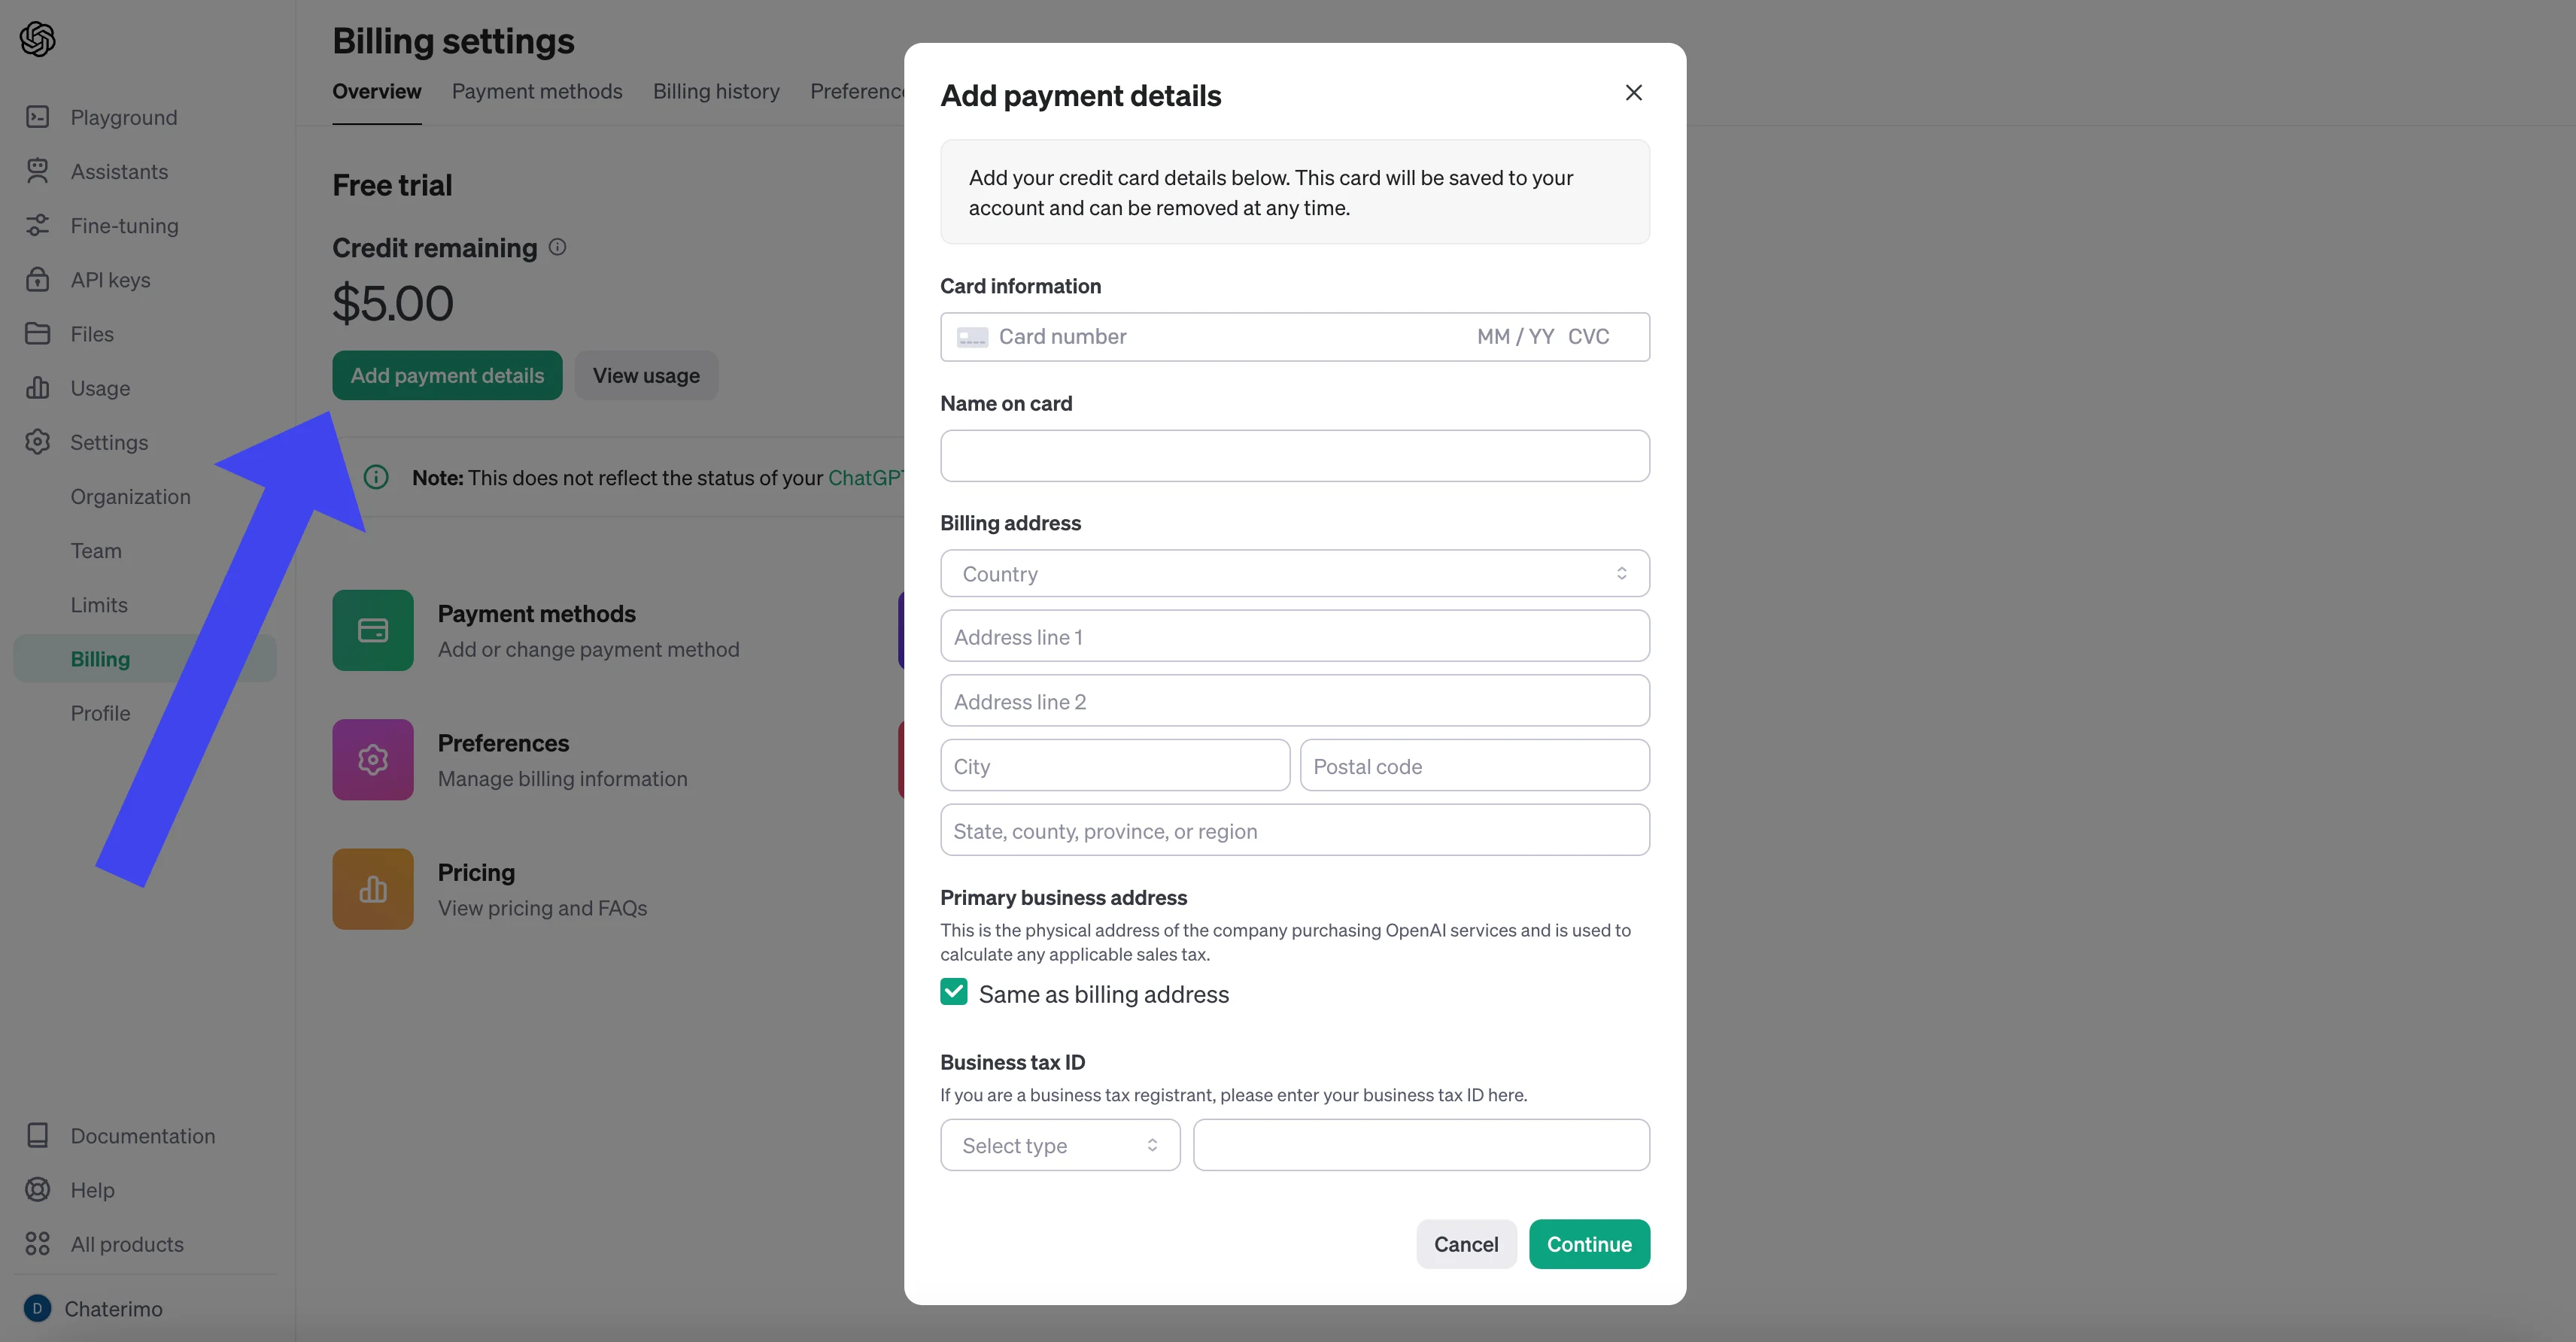
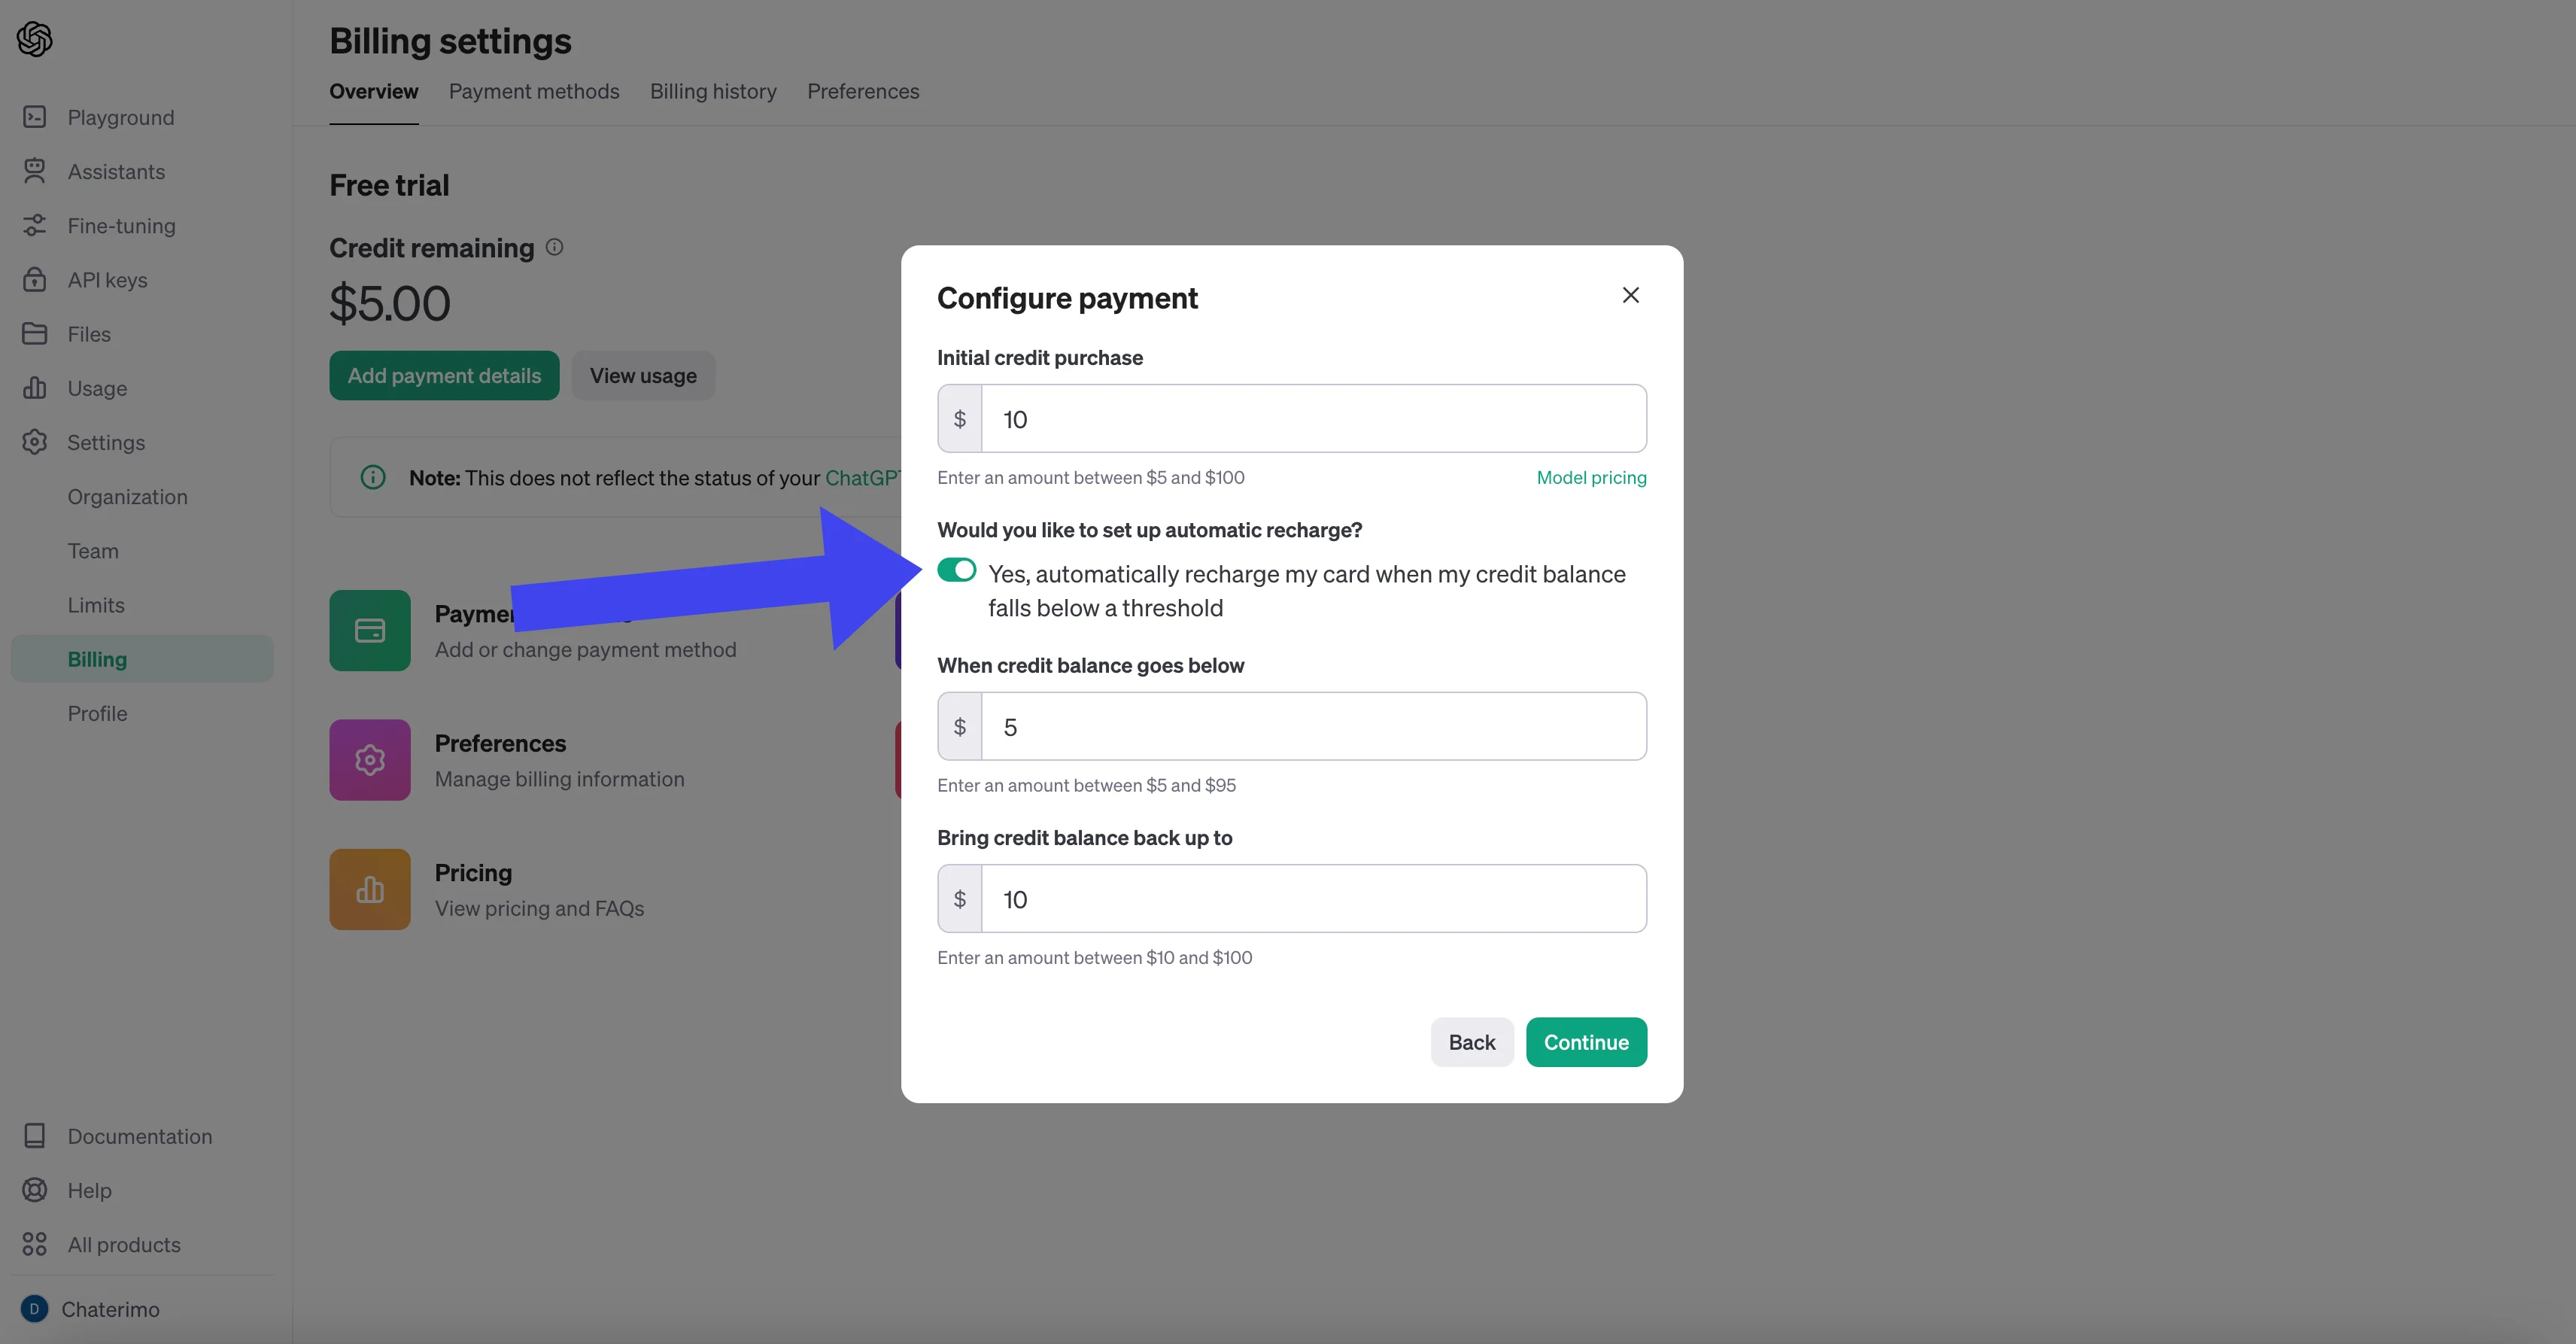
- Adding payment information: In the "Billing" section, click on "Add payment details." You will be prompted to enter your payment card details. It is also a good idea to check the automatic credit replenishment option in case it is spent, to ensure the continuity of the chatbot.
- Přidání kreditu: After filling in this information and confirming, the credit you selected will be added to your "Credit Balance". However, check whether you have at least some credit in the "credit balance", otherwise there is a risk that your OpenAI API key will not work and you will be asked again from Chaterimo to add payment methods.
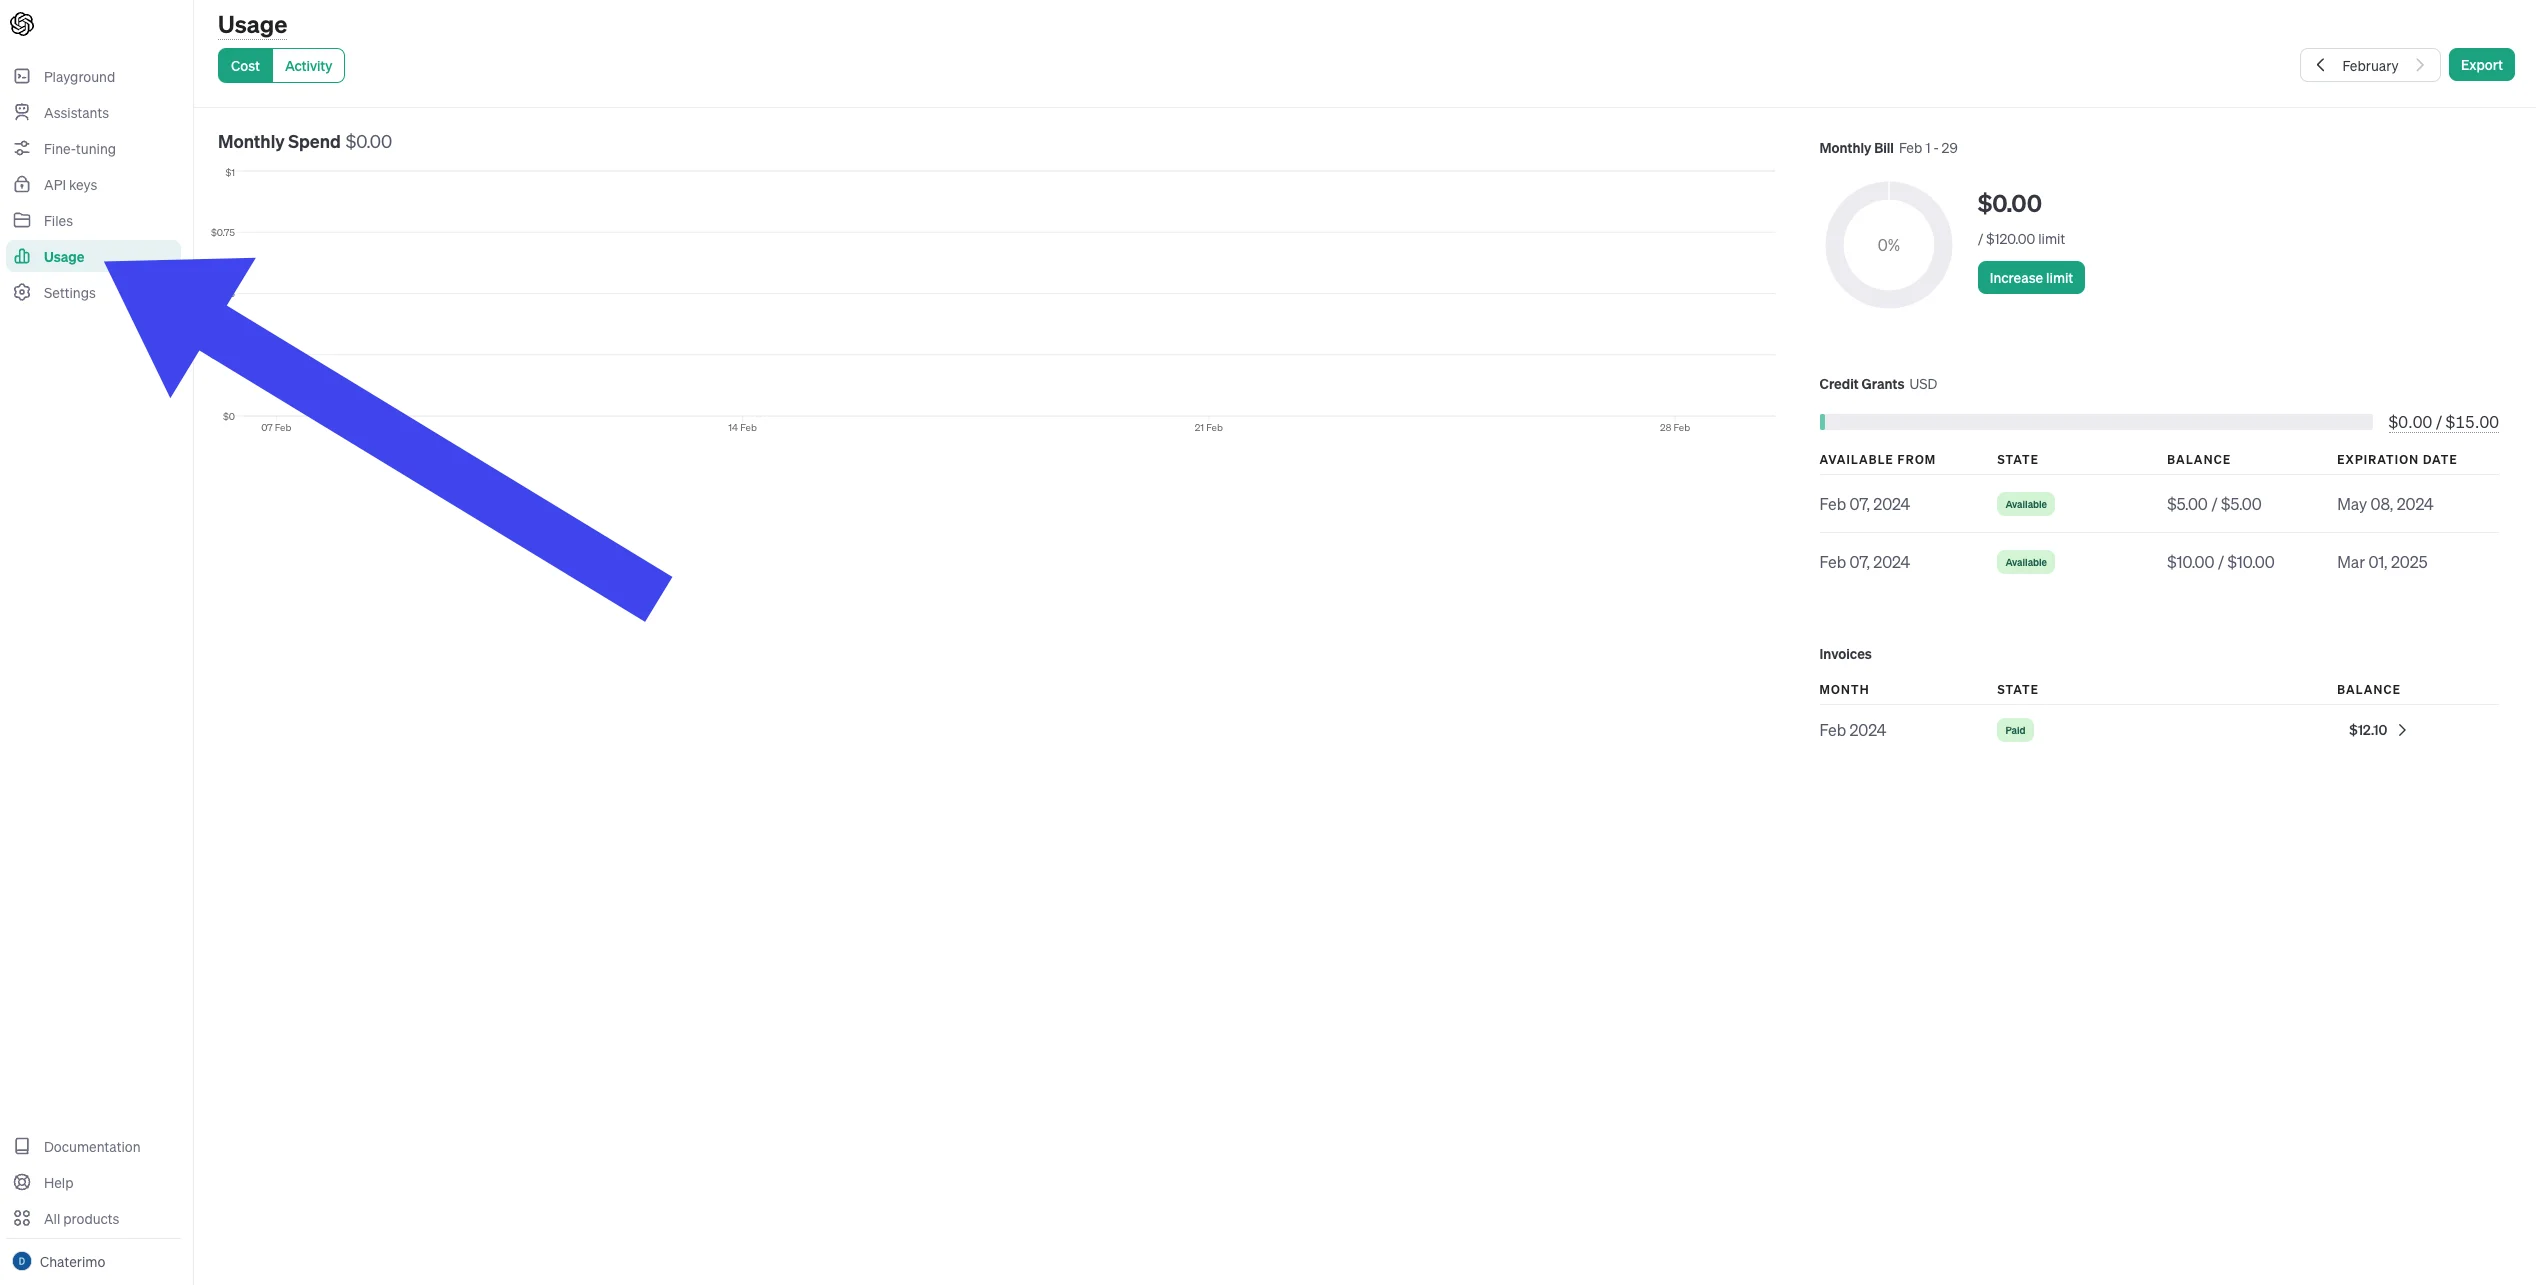
- The Usage section and checking spending: In this section, you can later check spending by days, and there is also a breakdown by individual OpenAI models (In case you test several models over a certain time frame).
3) Creating an API Key:
Now that you have successfully entered your payment details and have sufficient credit on your OpenAI account, it's time for the key step: creating an API key that will allow Chaterimo to communicate with OpenAI. This process is straightforward and includes the following steps:
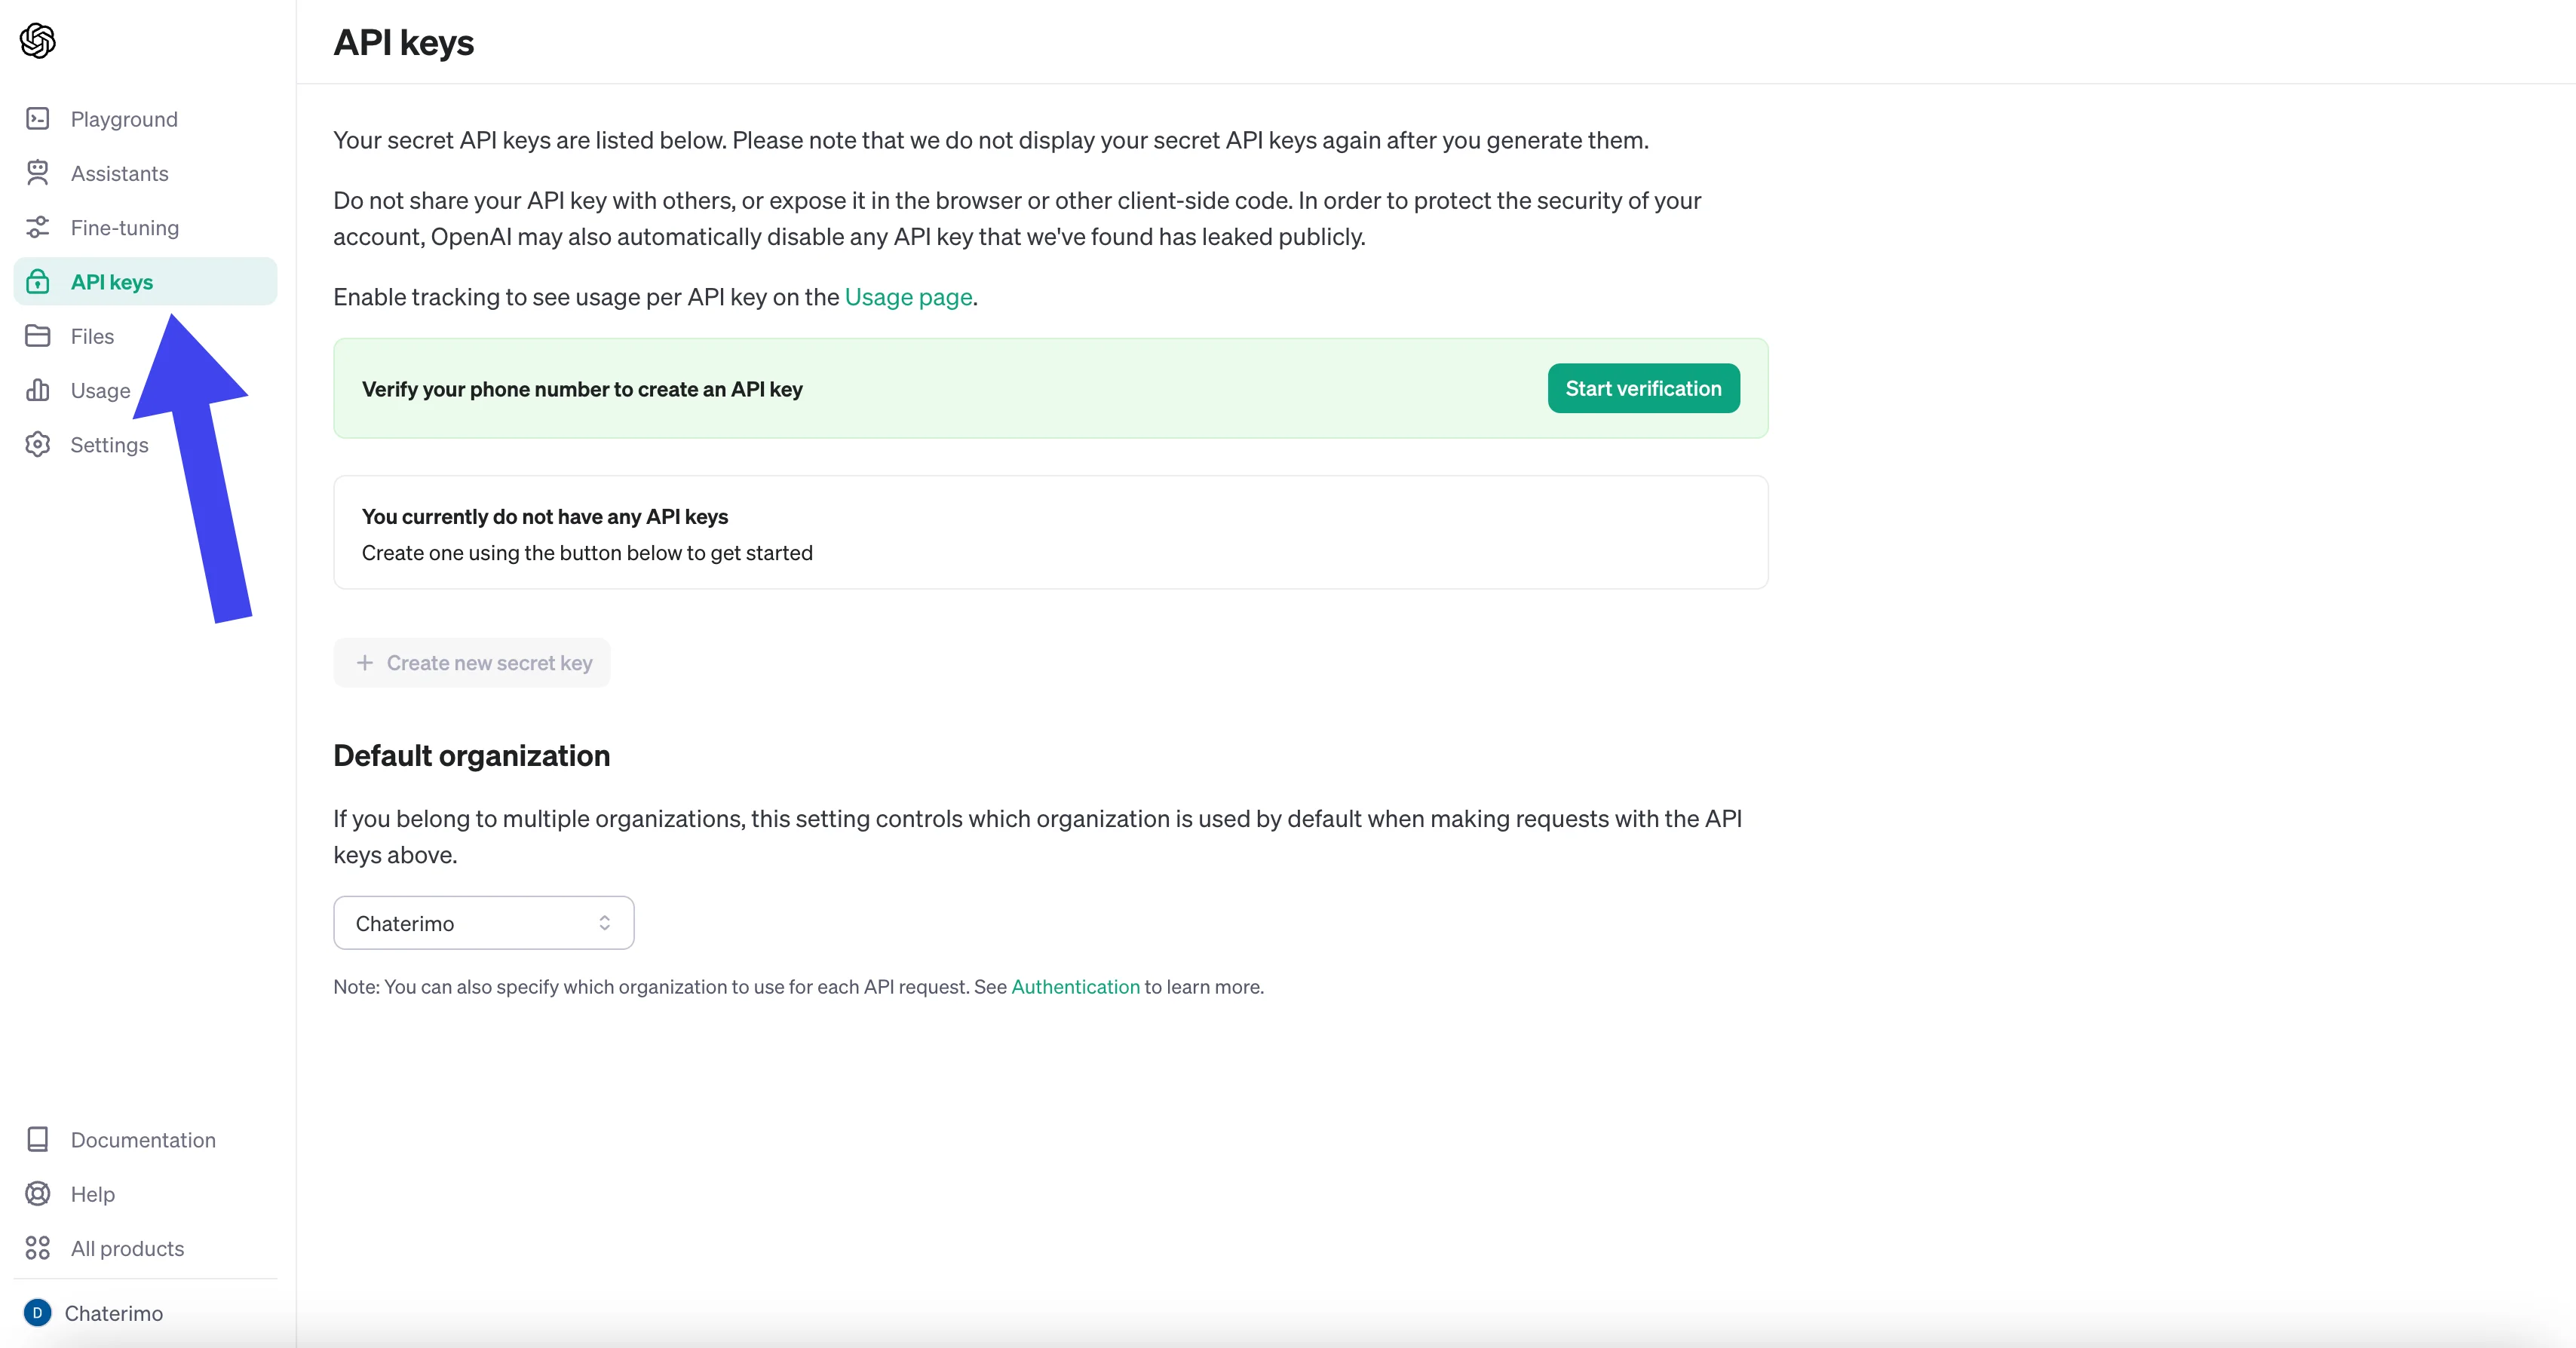
- Access the API keys section: Go to the "API keys" section of your OpenAI account through this link. Here you will find the option to create a new API key.
- Phone Number Verification: You will need to verify your phone number using the "Start verification" button. An SMS with a code will be sent to you, which you will fill in, and then you can proceed further.
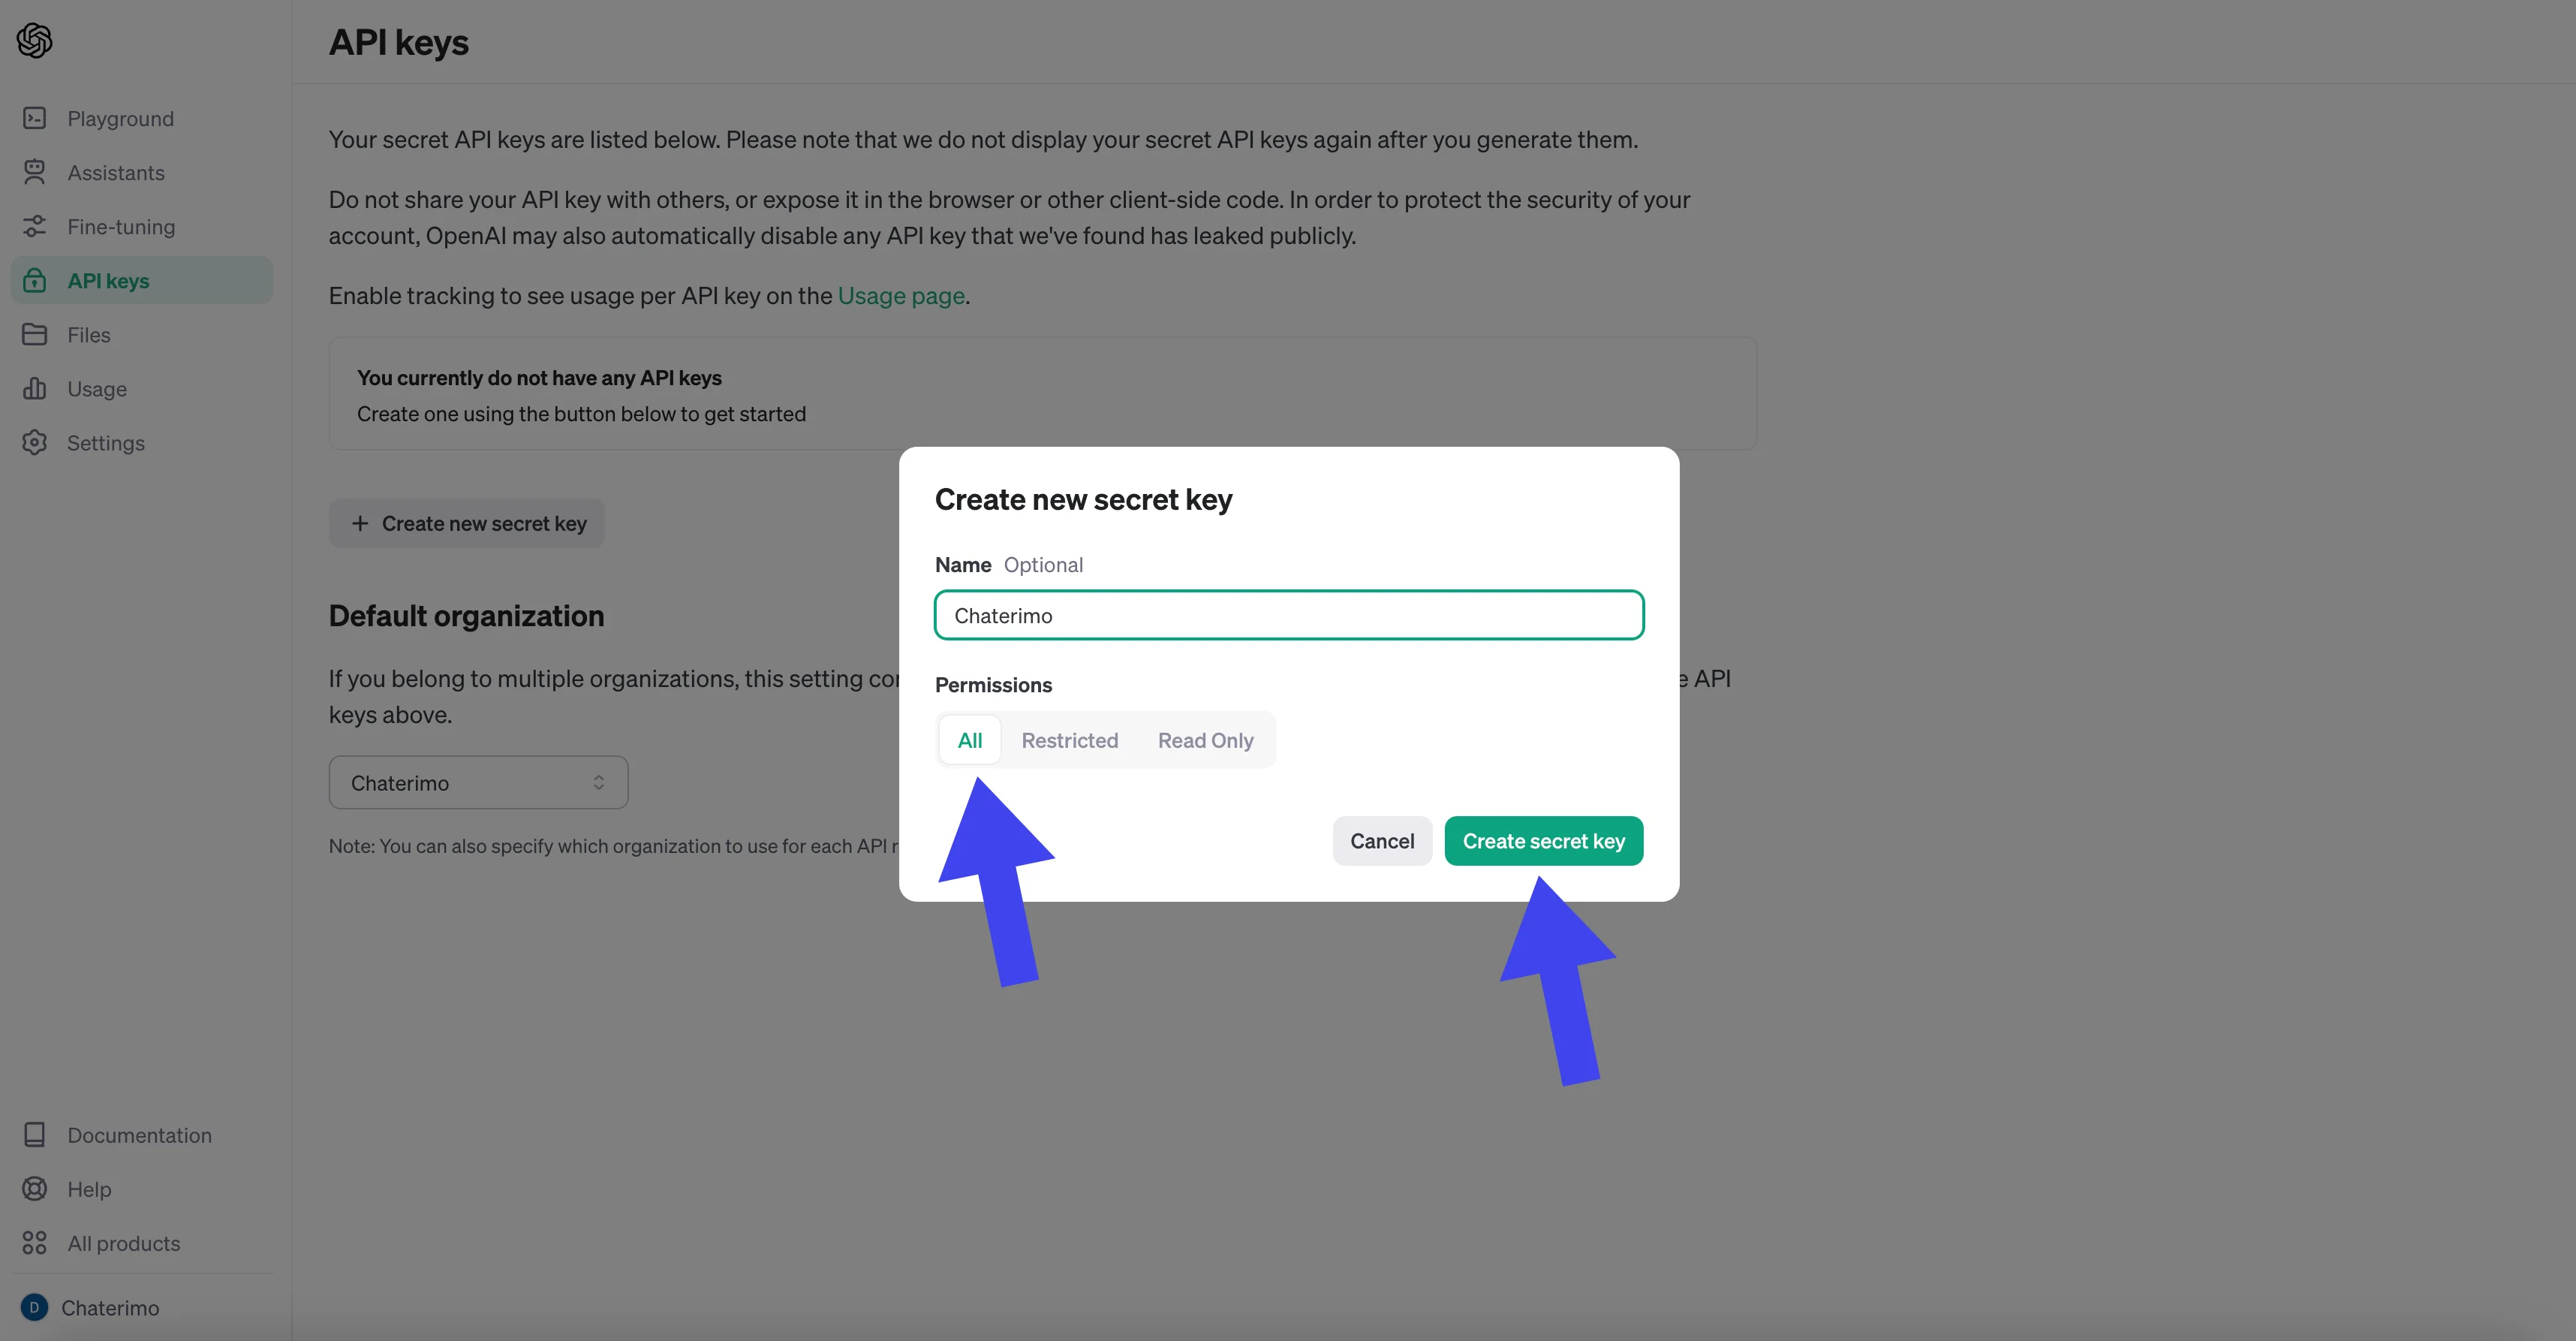
- Creating a New API Key: It's possible that the first time you create an API key, it will be done directly through a pop-up window "Create new secret key", where you enter a name (the name is not important). If the pop-up does not appear, simply click on the button to create a new API key. During this process, you will have the option to set various permissions for the key.
- Setting Permissions: For the purpose of integration with Chaterimo, it is necessary to choose the "ALL permissions" option. This setting will ensure that Chaterimo has full access to the OpenAI features necessary for effective communication and chatbot creation.
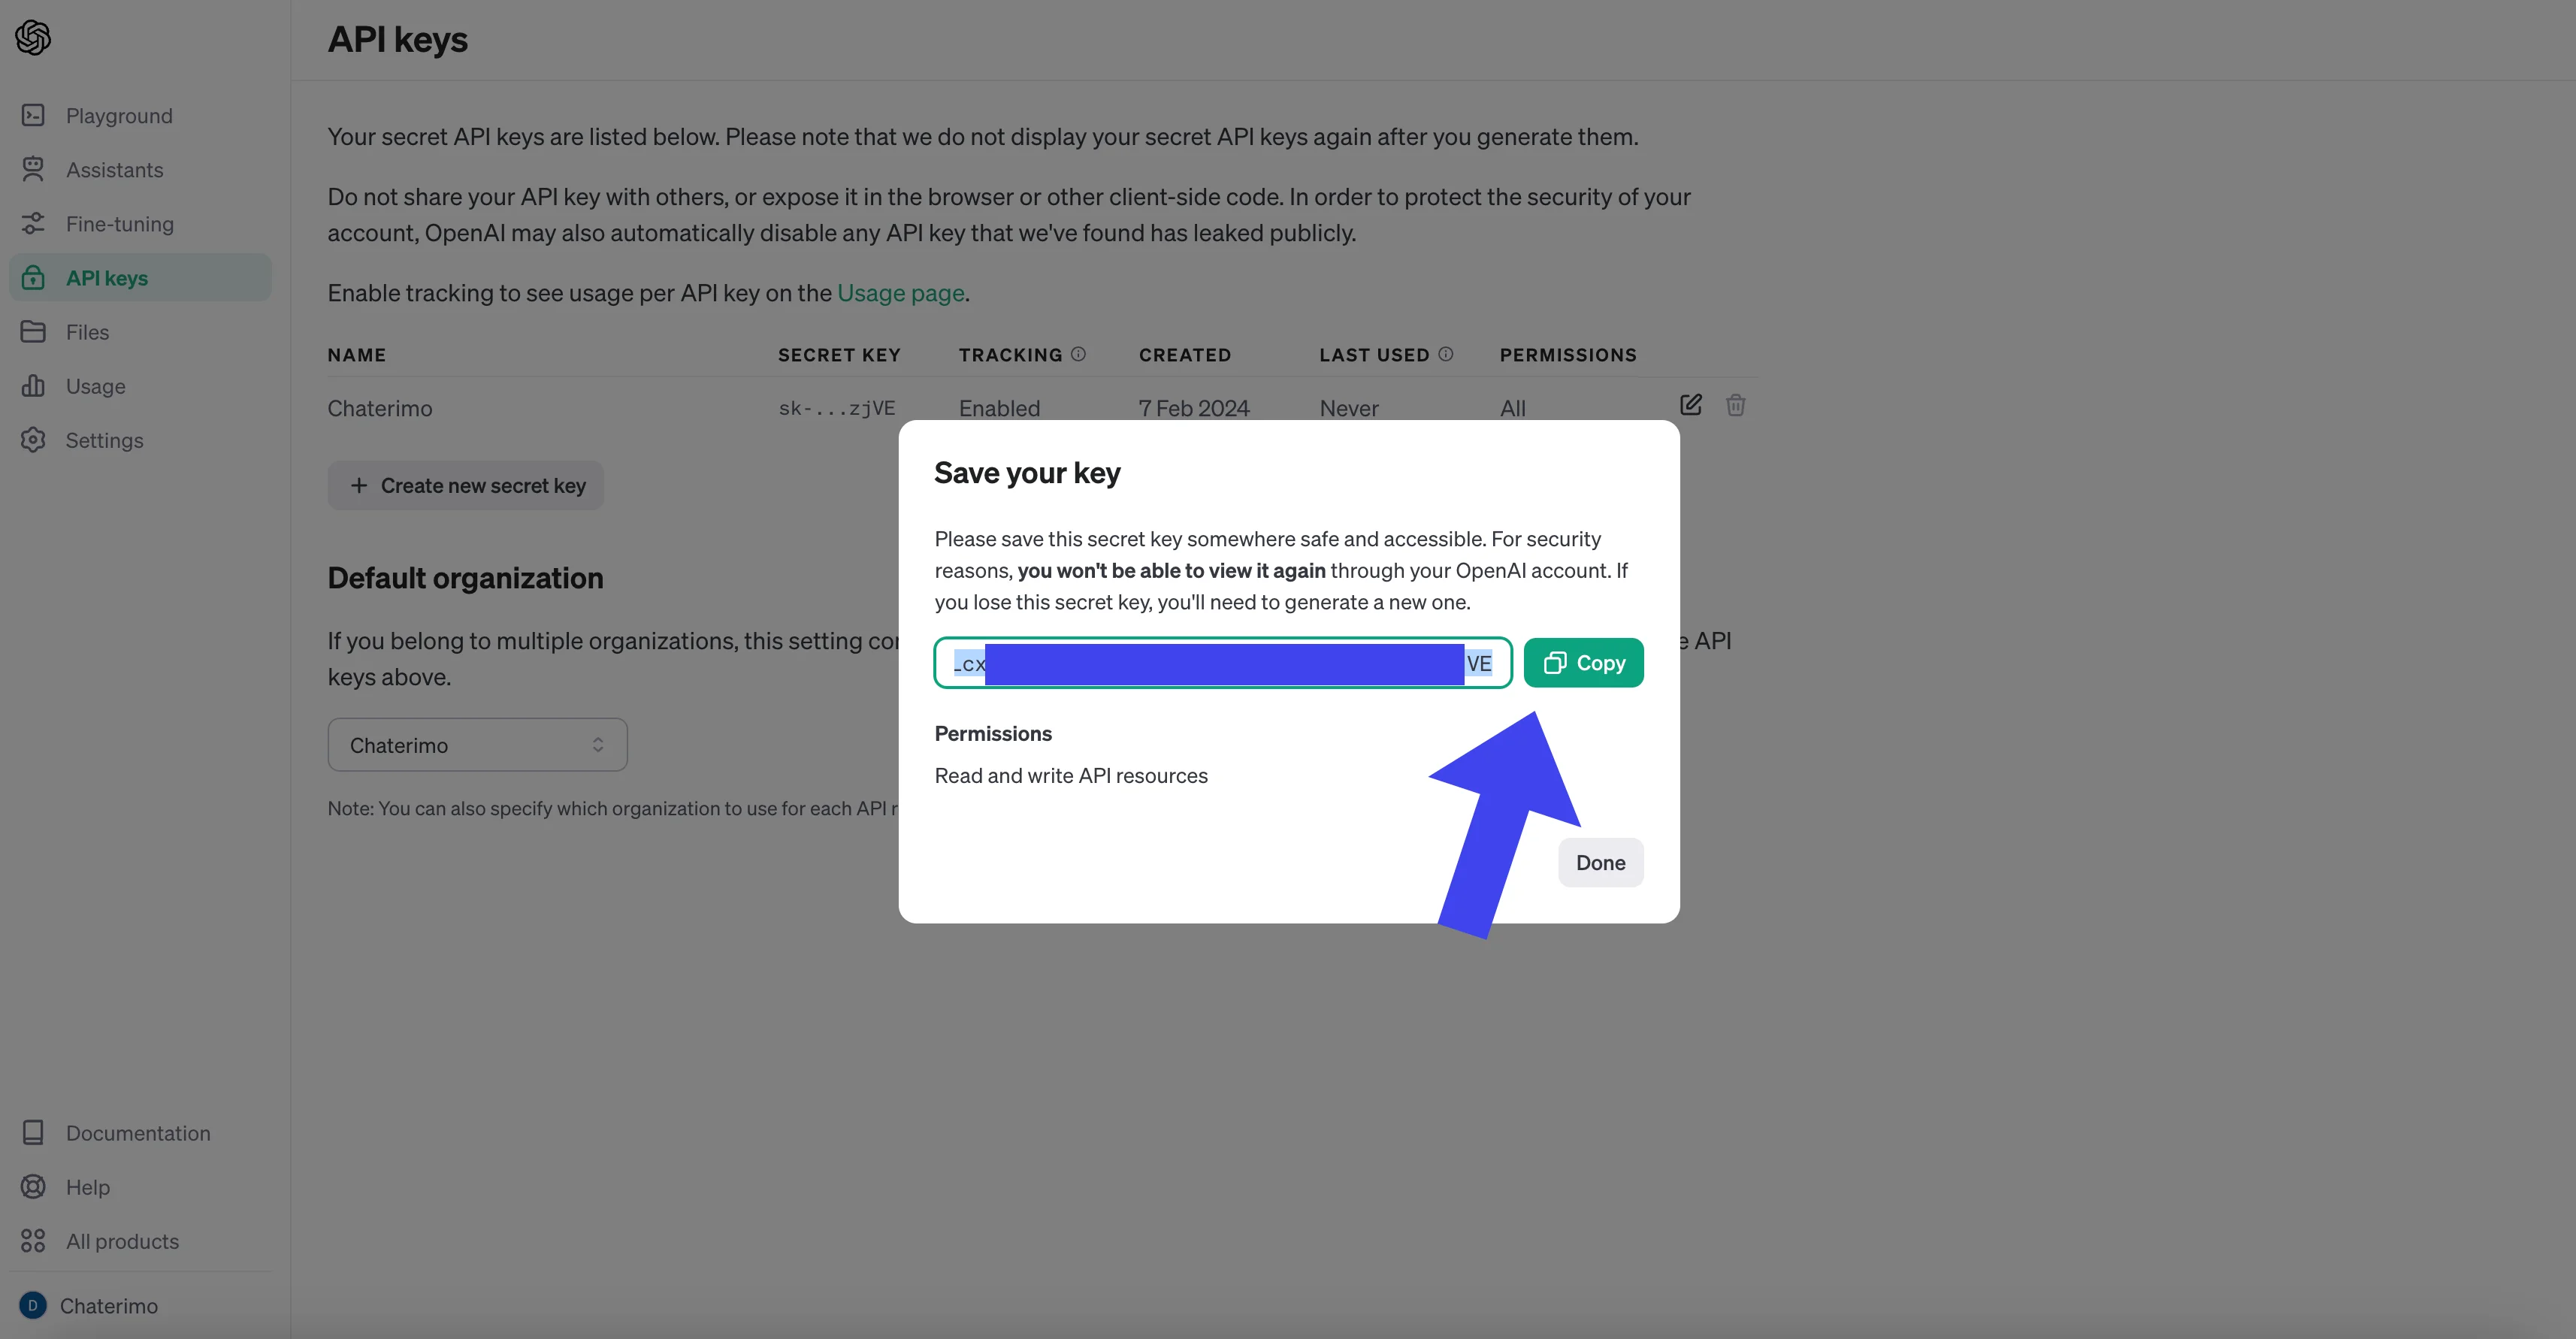
- Secure Storage of Your API Key: After creating the key, carefully copy its "secret_key" and store it in a secure place. This key is essential for linking Chaterimo with OpenAI, and it is critically important that it is protected and not accessible to unauthorized persons.
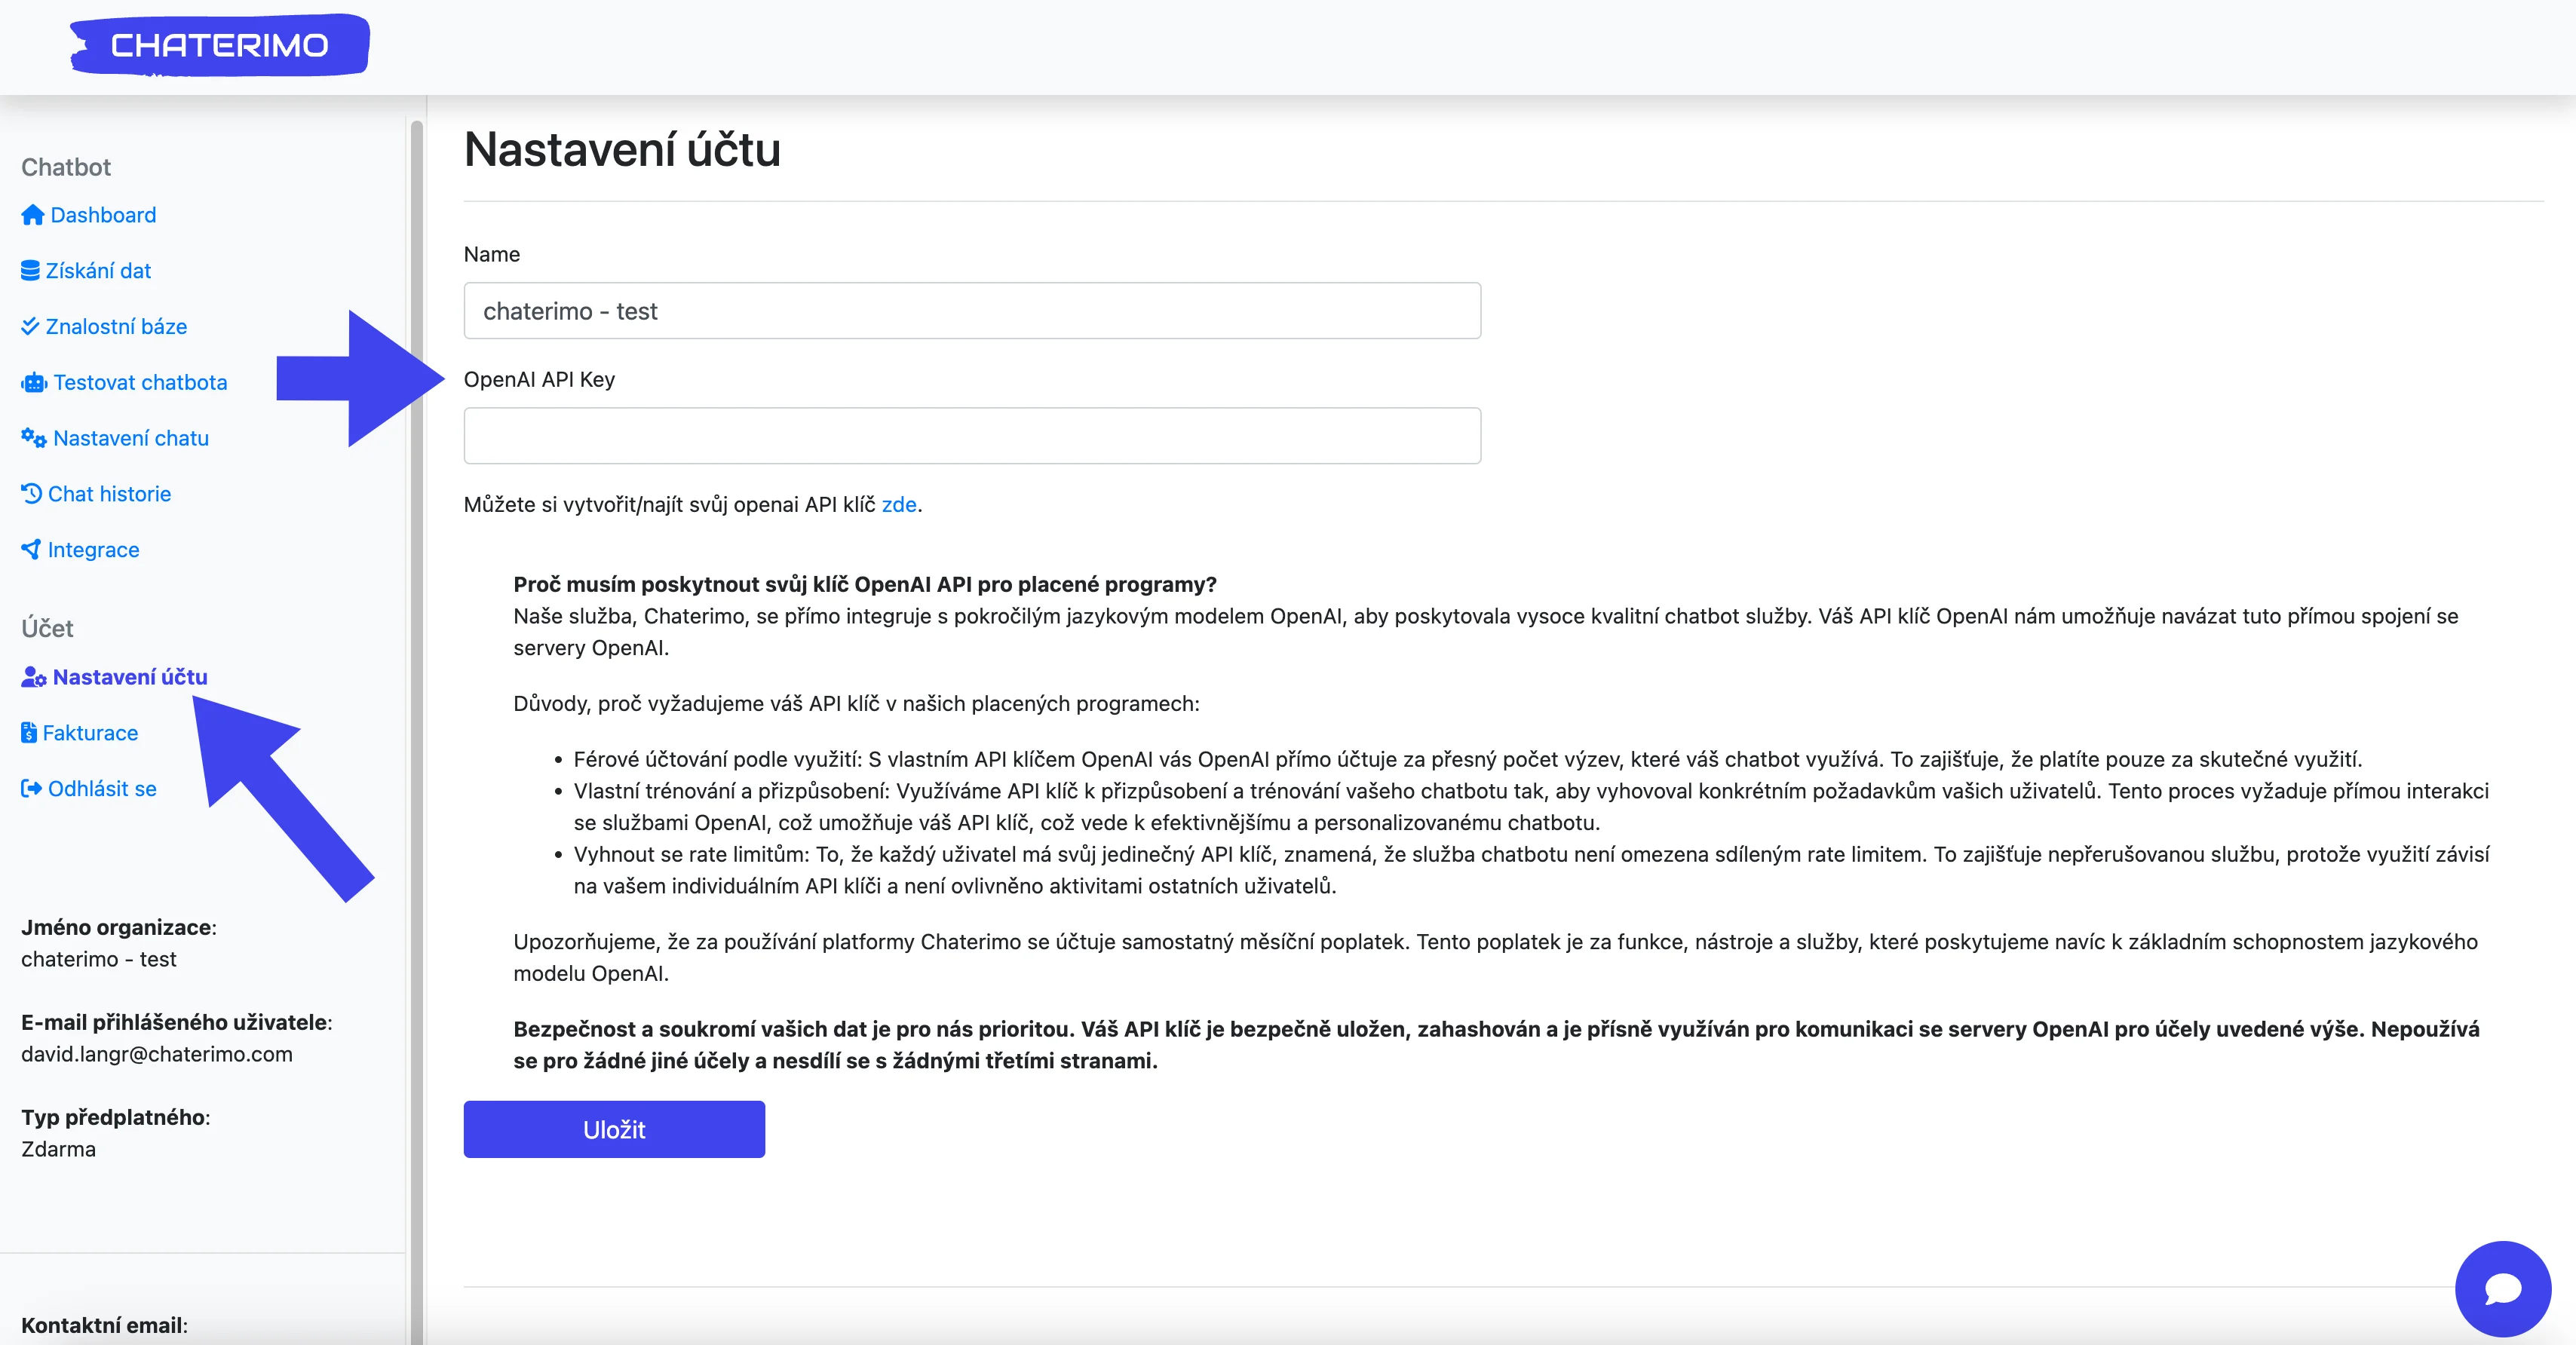
4) Uploading the API Key to Chaterimo:
After obtaining the API key from OpenAI, the last step to activate advanced chatbot services is to upload it into the Chaterimo system. This process will allow you to utilize the full potential of AI for your conversations. Follow these steps:
Mini-FAQ (OpenAI dashboard & API keys)
Where is the OpenAI API dashboard? Use the OpenAI Platform dashboard at platform.openai.com. This is where you manage your organization, billing, usage, and API keys.
How do I create an OpenAI API key? Go to API keys, click Create new secret key, then copy it and store it securely (you typically can’t view the full key again).
- Accessing Chat Settings: Open the Chaterimo website and log into your account. If you do not have an account yet, you will need to go through the sign up process.. In the navigation menu of your Chaterimo account, look for the "Settings" section, and then select the chat settings option, usually labeled as "Chat Settings".
- Copy/Paste the API Secret Key: In the chat settings section, look for the field to insert the API key. There will be a specific place to enter your "secret_key" from OpenAI. Carefully copy and paste your API key into this field. After saving, this secret_key will be hashed for security - but you can delete it or replace it with another at any time.
- Saving and Activation: After inserting the API key, do not forget to save your settings. By doing this, the API key is activated and Chaterimo will start using OpenAI's AI models for generating chatbot responses. It's possible that it may take a while for the OpenAI API account with payment details to activate (it should be done within 15 minutes), so an error might occur during chatbot testing. If you need help, write to us at [email protected], and we will attend to you promptly.