Google AI Studio: Sign In, Create Gemini API Key + Billing (2026)
In today's competitive digital landscape, AI-powered customer support has become essential for businesses looking to provide exceptional service while controlling costs. Chaterimo offers a cutting-edge solution that integrates seamlessly with Google's Gemini AI models to deliver intelligent, contextual responses to your customers.
Why choose Google Gemini API for your chatbot? Gemini models are multimodal, fast, and competitively priced. Google offers generous free quotas, making Gemini an excellent choice for businesses starting with AI. When combined with Chaterimo, you can run a cost-controlled chatbot on your own Gemini key (BYOK).
🧭 Quick navigation
Jump to:
What is Google AI Studio? · Sign in to Google AI Studio · Login troubleshooting · Create your Gemini API key · Billing / Google Cloud · Connect the key to Chaterimo (BYOK) · FAQ
🛍️ Using Gemini for Shopify AI customer service (BYOK)
If you're a Shopify merchant, you can use this Gemini API key with Chaterimo to run Shopify AI customer service (Shopify AI chat) with predictable costs (BYOK). Start by automating WISMO (order status), returns, and product Q&A:
Shopify AI customer service (pillar guide) · Best AI Chatbot for Shopify · Best Live Chat for Shopify
💡 TL;DR - Why Use Google Gemini API with Chaterimo?
- Gemini models are multimodal, fast, and excellent at understanding context
- Gemini Flash & Gemini Pro for different speed/quality trade-offs
- Generous free tier — great for getting started without upfront costs
- Seamless integration with your existing Chaterimo chatbot
- Pay-per-use model — only pay for what you actually use beyond free quota
Ready to upgrade your AI customer support? This guide walks you through the entire setup process in just a few simple steps.
🚀 What Makes Chaterimo Different?
Chaterimo is the most advanced AI customer support platform designed for serious businesses. Unlike basic chatbots, we provide enterprise-grade features at startup-friendly prices, starting from just $9/month.
🏆 Professional Features That Matter:
- Lightning Setup - Shopify, Shoptet, Upgates apps
- Own API Keys - OpenAI, Anthropic, Gemini
- Smart Ticketing - AI creates tasks for humans
- iFrame Integration - Direct page embedding
- Multiple Chatbots - Different use cases
- Order Intelligence - Shopify integration
- Advanced Training - 70k products, API feeds
- AI Model Testing - Compare & optimize
- Facebook & Make.com - Multi-platform
- EmailBot - Coming soon 🚀
💰 Starting at $9/month - Most affordable enterprise AI with your own API keys!
Ready to deploy professional AI customer support? This guide shows you how to connect Google Gemini with Chaterimo! 💪
What is Google AI Studio (and how is it different from Gemini chat)?
Google AI Studio (aistudio.google.com) is the developer platform where you:
- sign in with your Google account to access Gemini API
- create, manage, and revoke Gemini API keys
- test prompts and explore different Gemini models
- set up billing through Google Cloud
Gemini (gemini.google.com) is the consumer chat product. If your goal is to connect Gemini to Chaterimo using BYOK, you need an AI Studio API key, not a Gemini chat subscription.
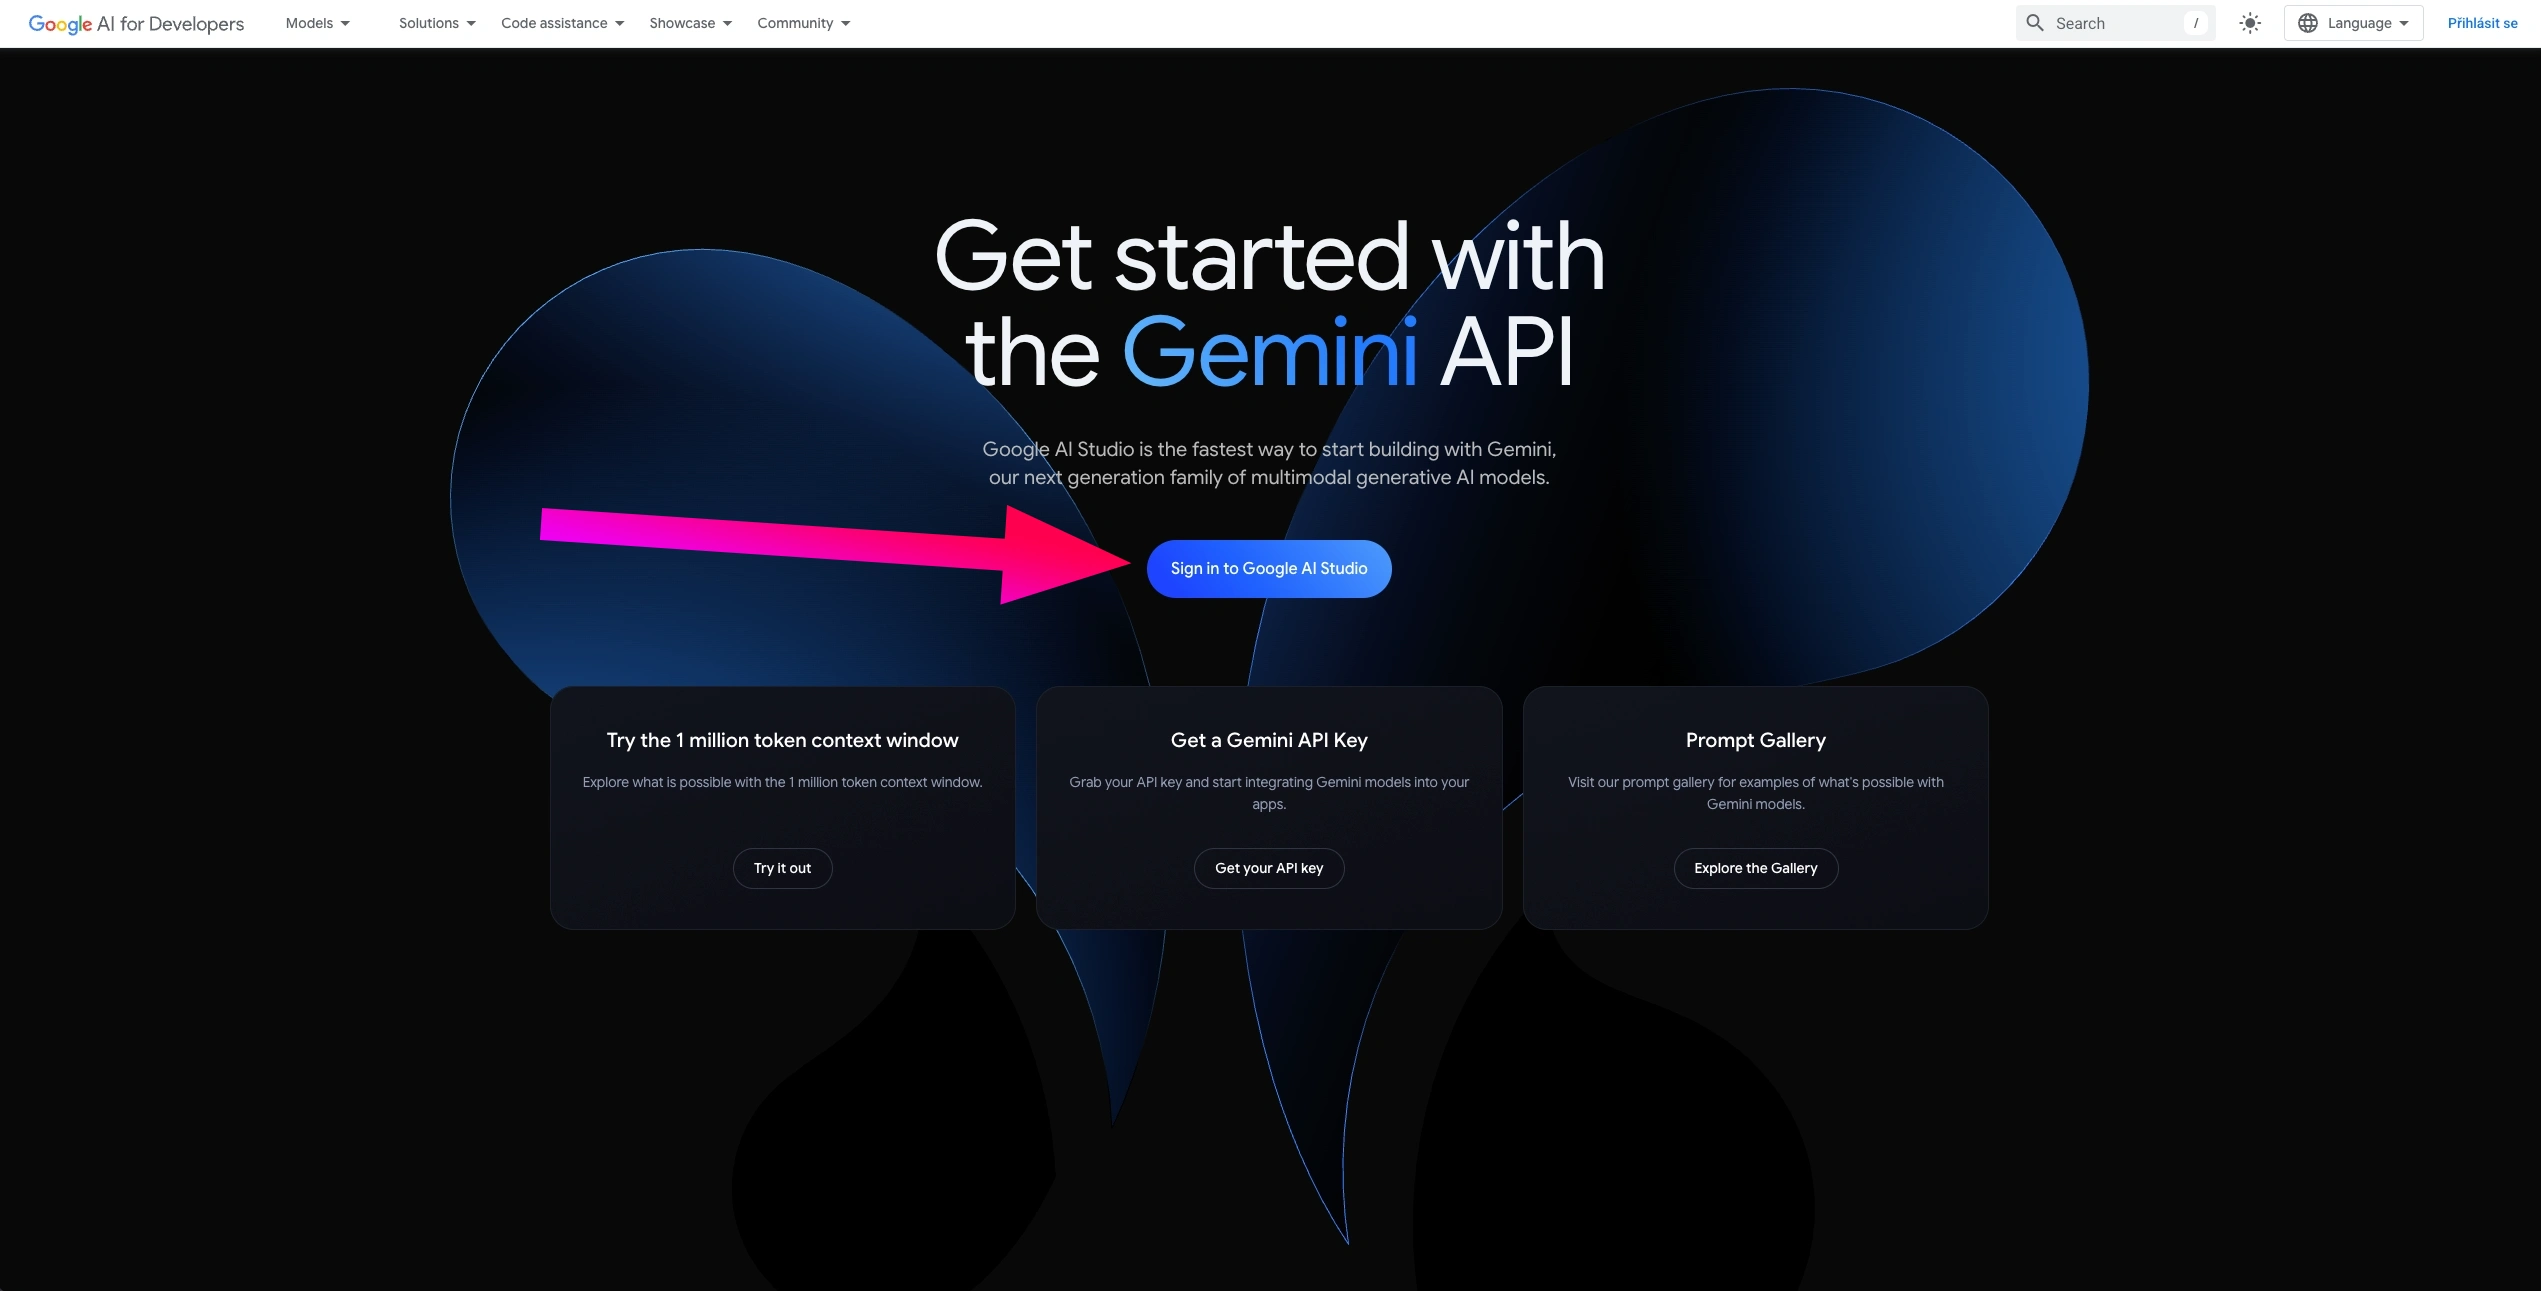
Sign in to Google AI Studio
Getting started with Google AI Studio is simple — you just need a Google account. Once signed in, you'll have access to the dashboard where you can create API keys and test Gemini models.
- Visit Google AI Studio: Go to aistudio.google.com and click "Sign in" to begin.
- Sign in with Google: Use your existing Google account (Gmail). No separate registration is needed — AI Studio uses your Google account infrastructure.
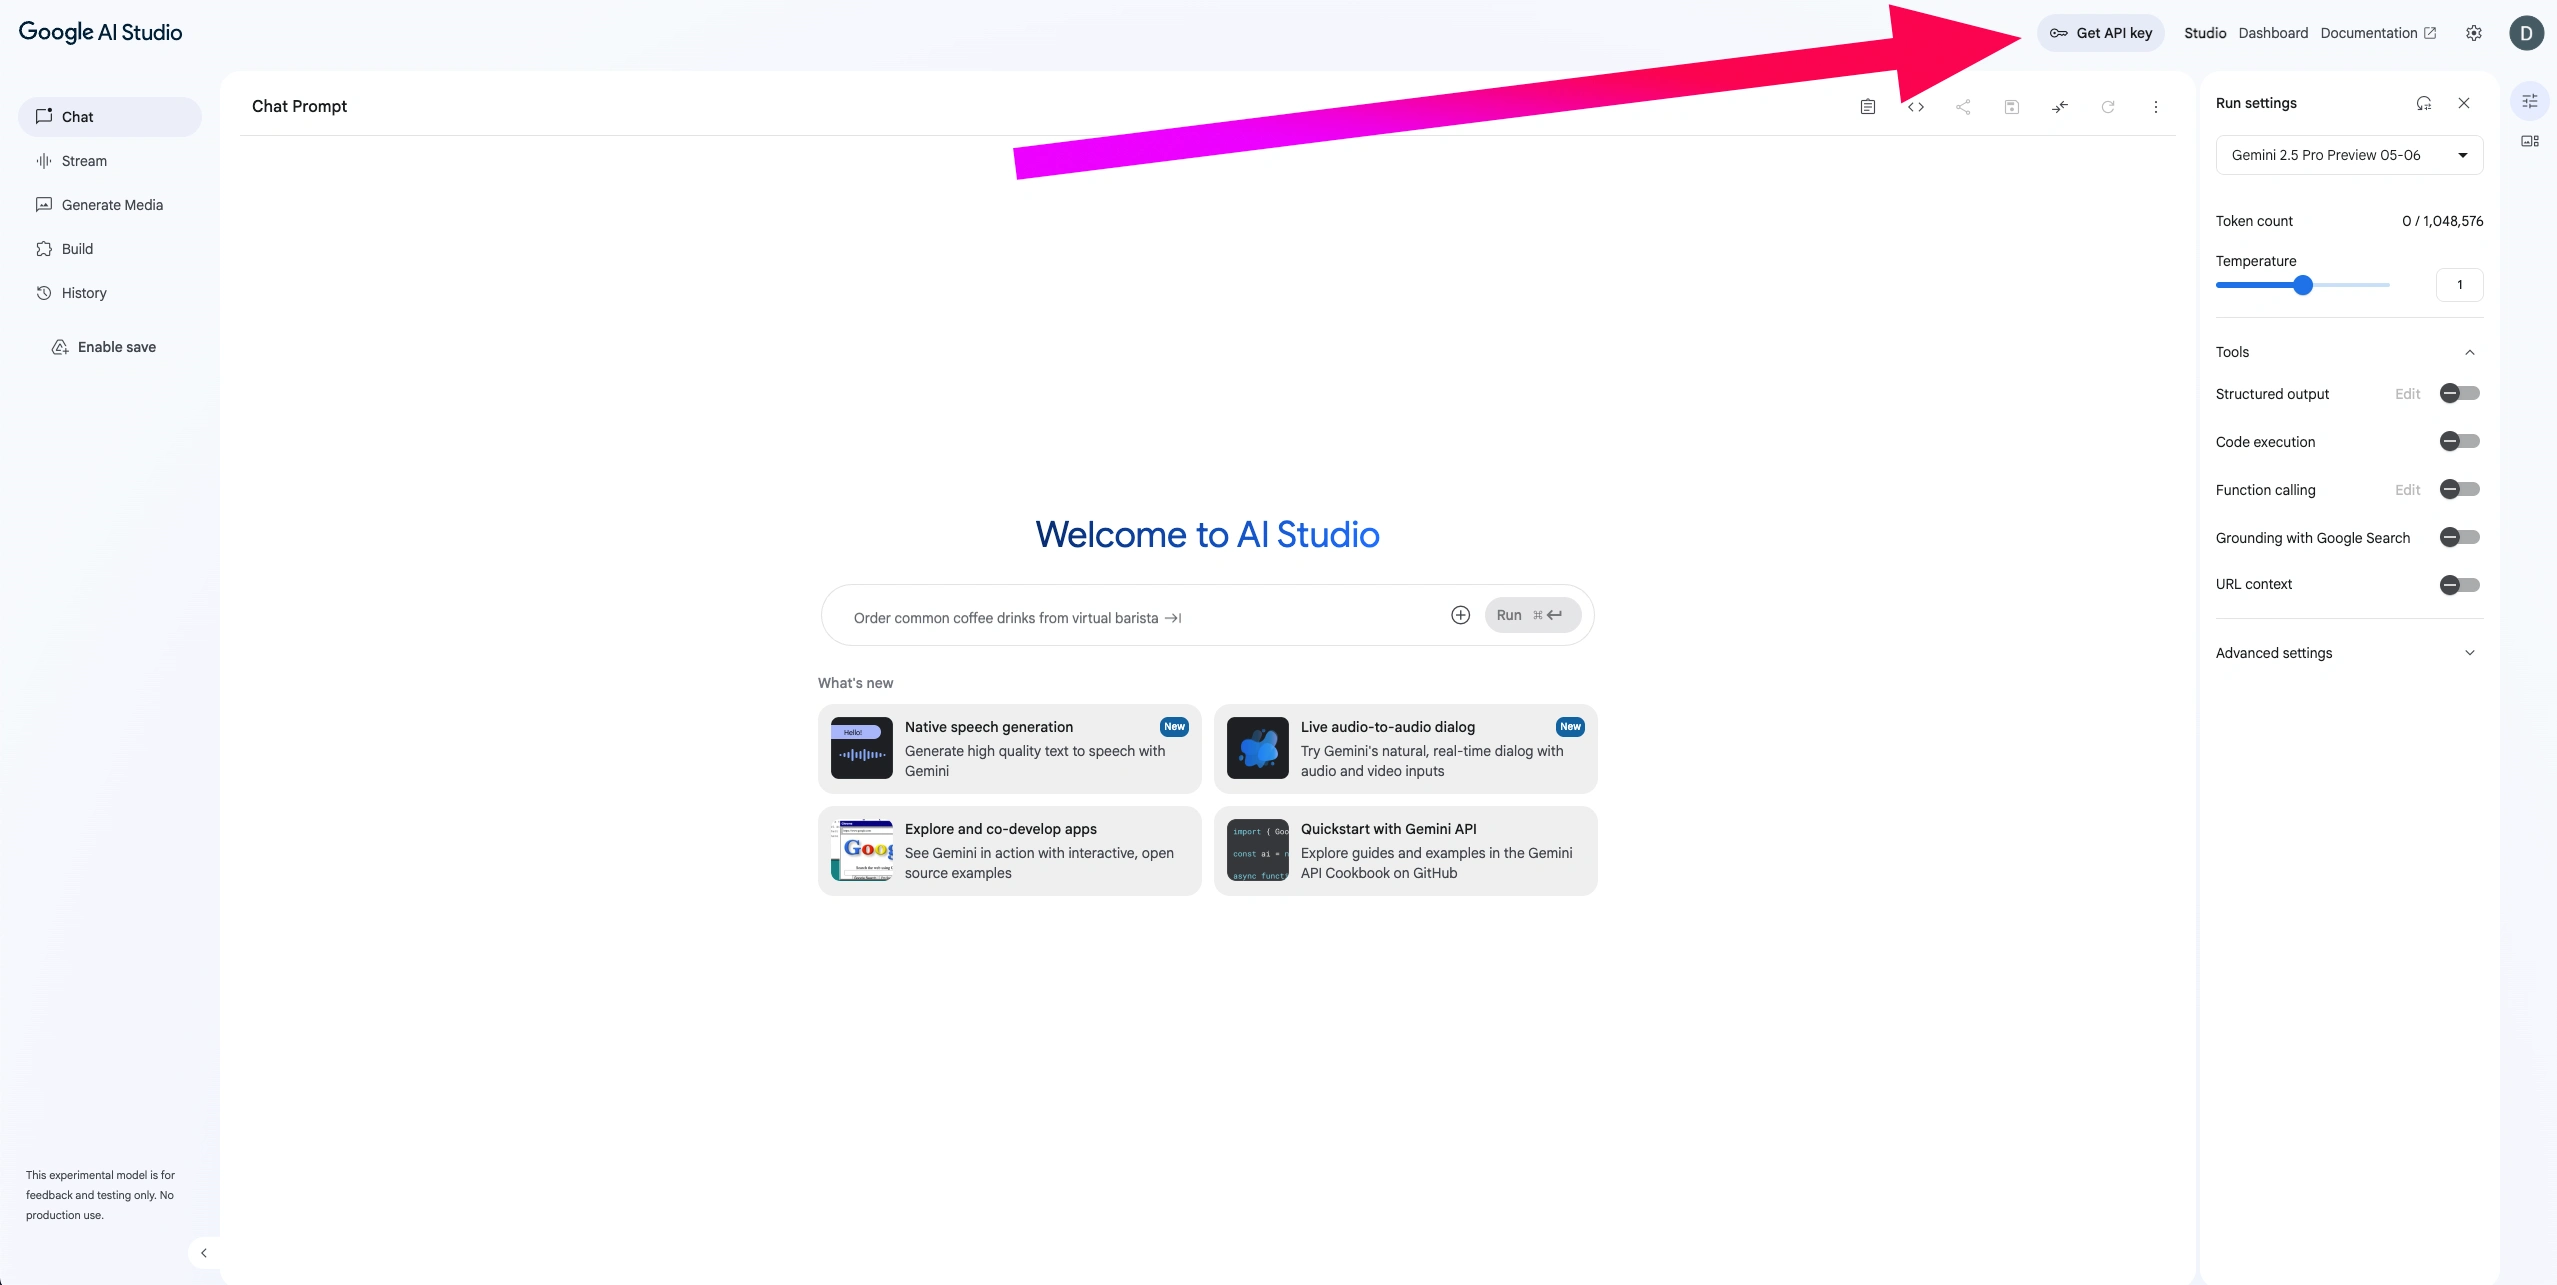
- Explore the Dashboard: Once logged in, you'll see the AI Studio dashboard with options to create prompts, explore examples, and generate your API key.
💡 No Separate Account Needed
Unlike OpenAI or Anthropic, Google AI Studio doesn't require a separate developer account. Your existing Google account gives you immediate access to the Gemini API.
Login troubleshooting (Google AI Studio)
If you're having trouble accessing Google AI Studio, check these common issues:
- Use the right URL: aistudio.google.com (developer platform), not gemini.google.com.
- Check your Google account: make sure you're signed into the correct Google account in your browser.
- Regional restrictions: Google AI Studio may not be available in all countries. Check available regions.
- Workspace accounts: if using a Google Workspace account, your admin may need to enable AI Studio access.
✅ Quick check
Once logged in, you should see a "Get API key" button in the sidebar or on the main dashboard.
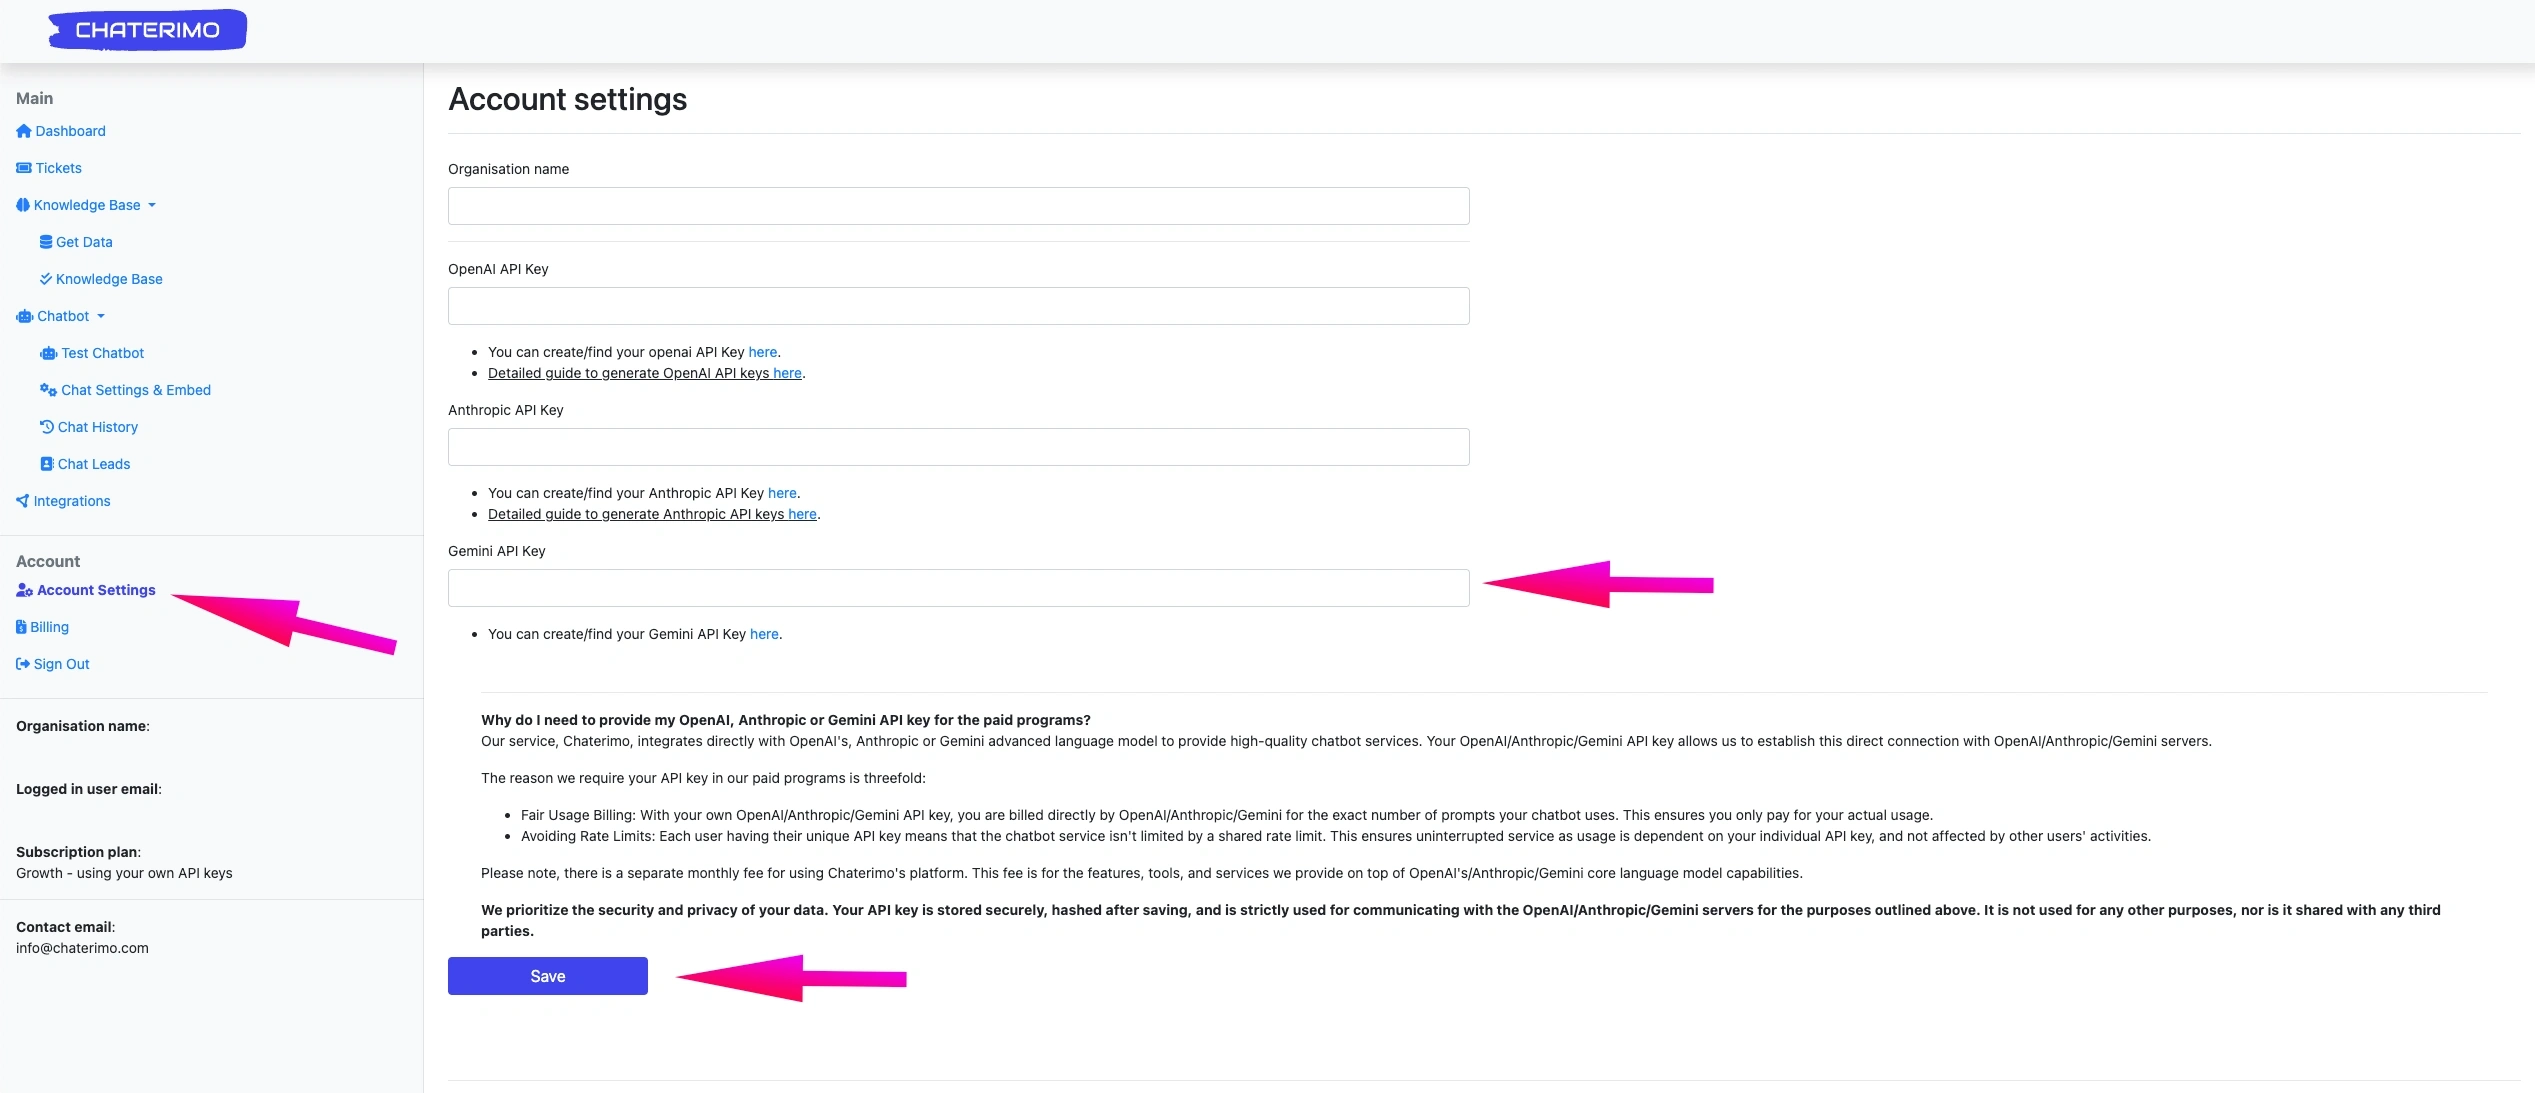
Create your Gemini API key
Your API key is the secure bridge between Chaterimo and Google's Gemini AI models. This key enables your chatbot to access advanced AI capabilities while maintaining security and proper usage tracking.
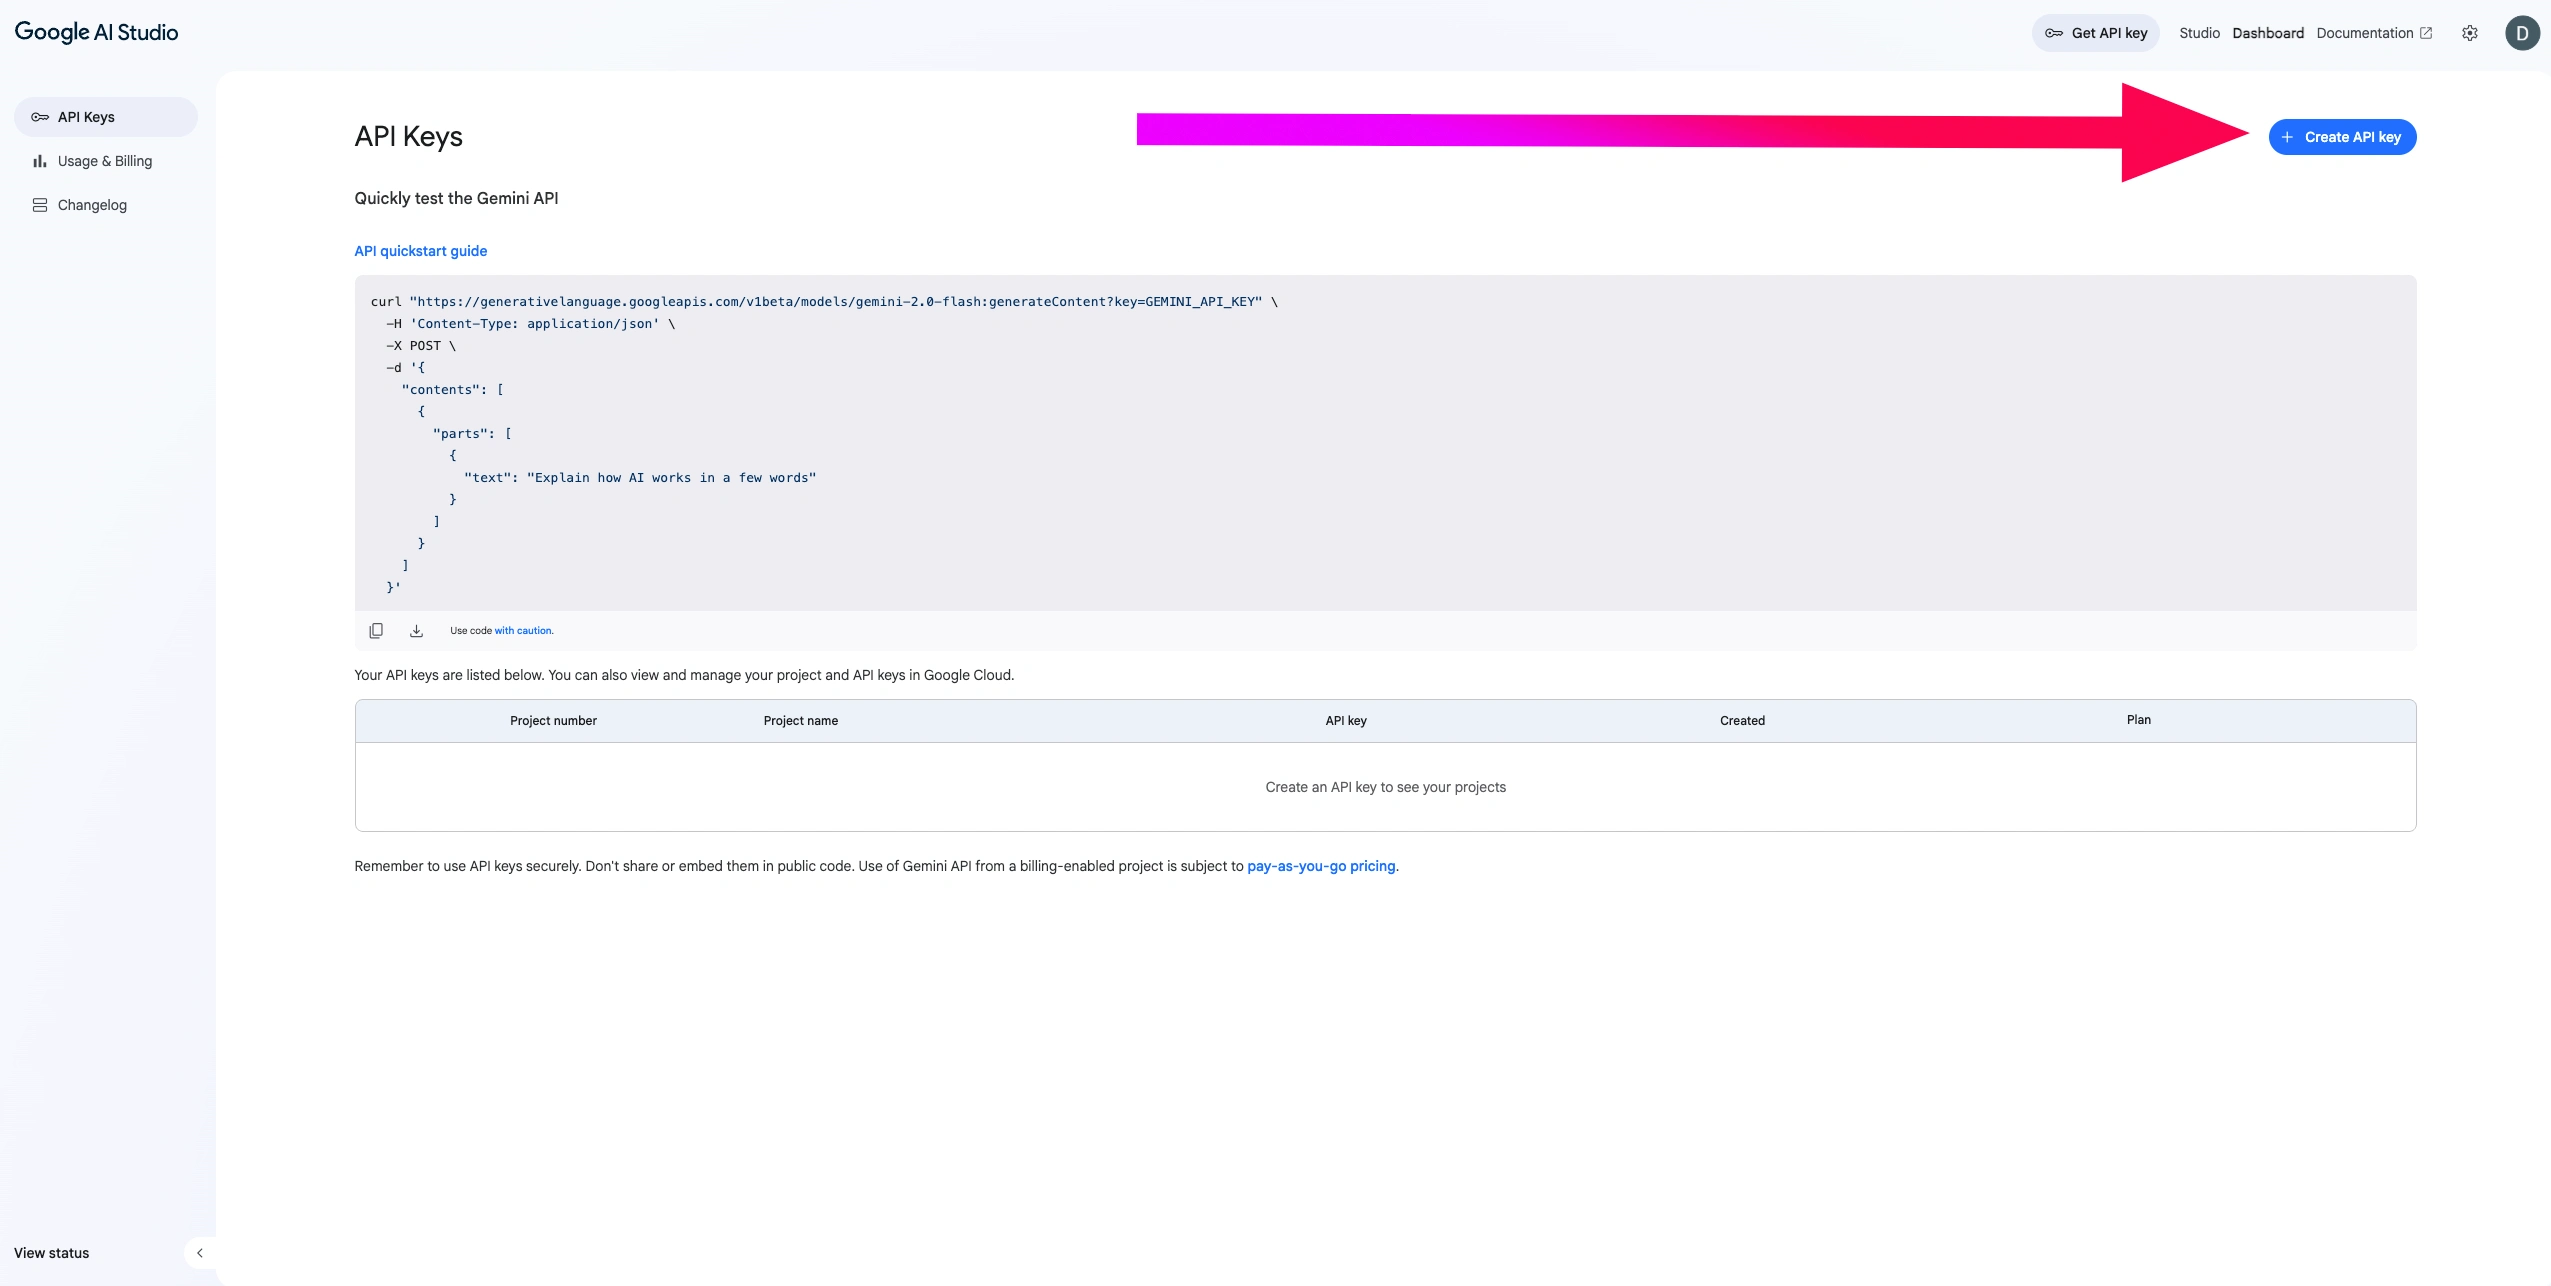
- Navigate to API Keys: In Google AI Studio, click the "Get API key" button in the left sidebar or on the dashboard.
- Create a New API Key: Click "Create API key". You can create a key for a new Google Cloud project or select an existing one. For Chaterimo, creating a new project (e.g., "Chaterimo-Gemini") is recommended.
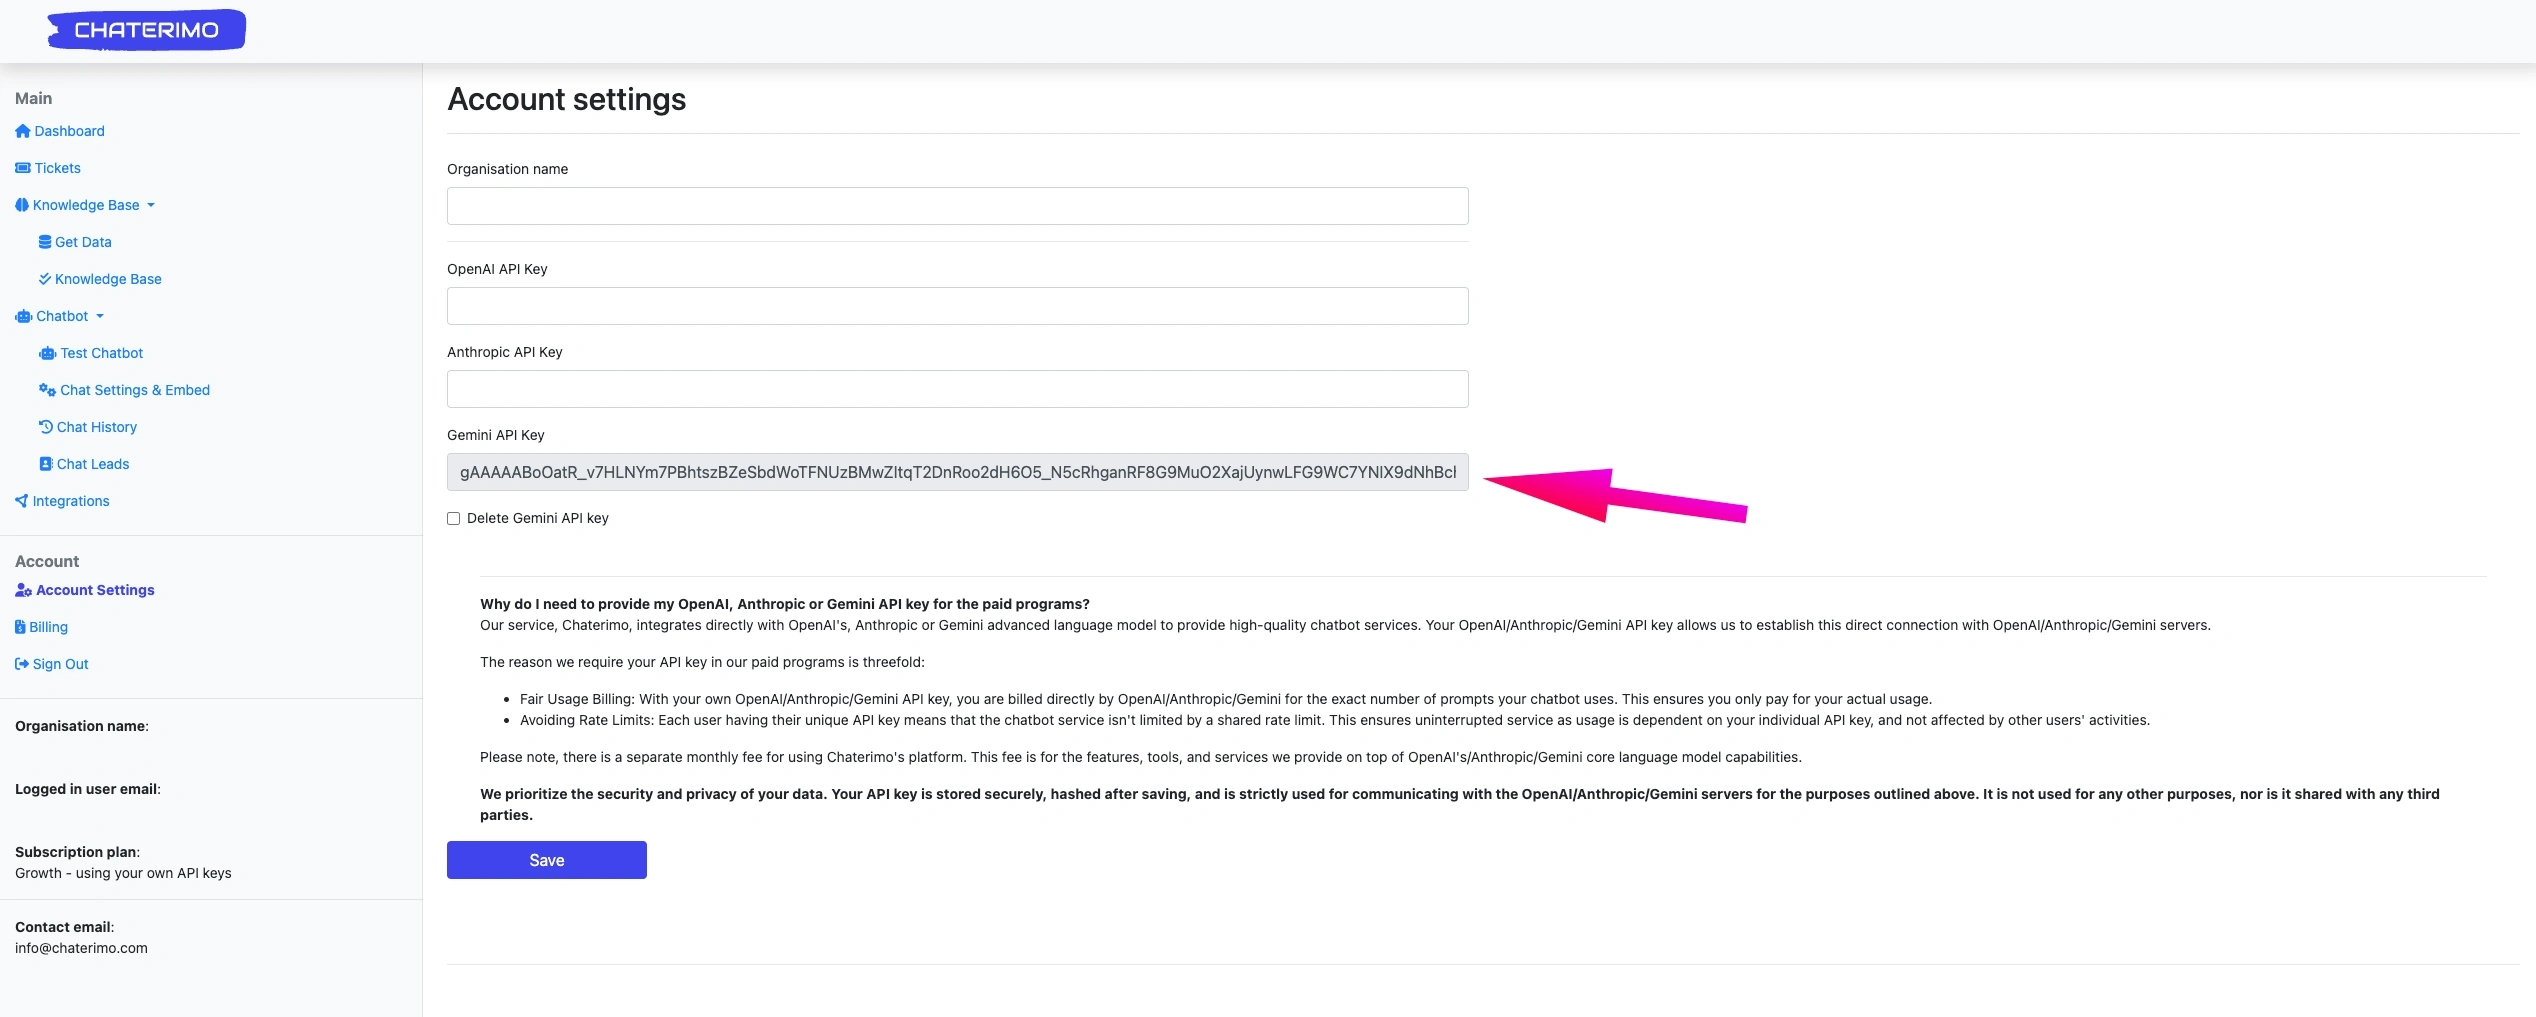
- Copy Your Key Safely: Once generated, copy the API key immediately. Store it securely — you can always view it again in AI Studio, but treat it like a password.

🔐 Critical Security Warning
Never share your API key publicly! Treat it like a password. If compromised, delete it immediately in AI Studio and generate a new one. Google will charge your account for all API usage with this key.
💰 Cost Management Tip
Google offers generous free quotas for Gemini API. Most small chatbots can operate within the free tier. Set budget alerts in Google Cloud to monitor spending.
🔁 API key rotation (recommended)
For security, treat API keys like passwords. If a key leaks or you rotate keys periodically:
- Create a new key in AI Studio → API Keys
- Update the key in Chaterimo (BYOK settings)
- Delete the old key in Google AI Studio
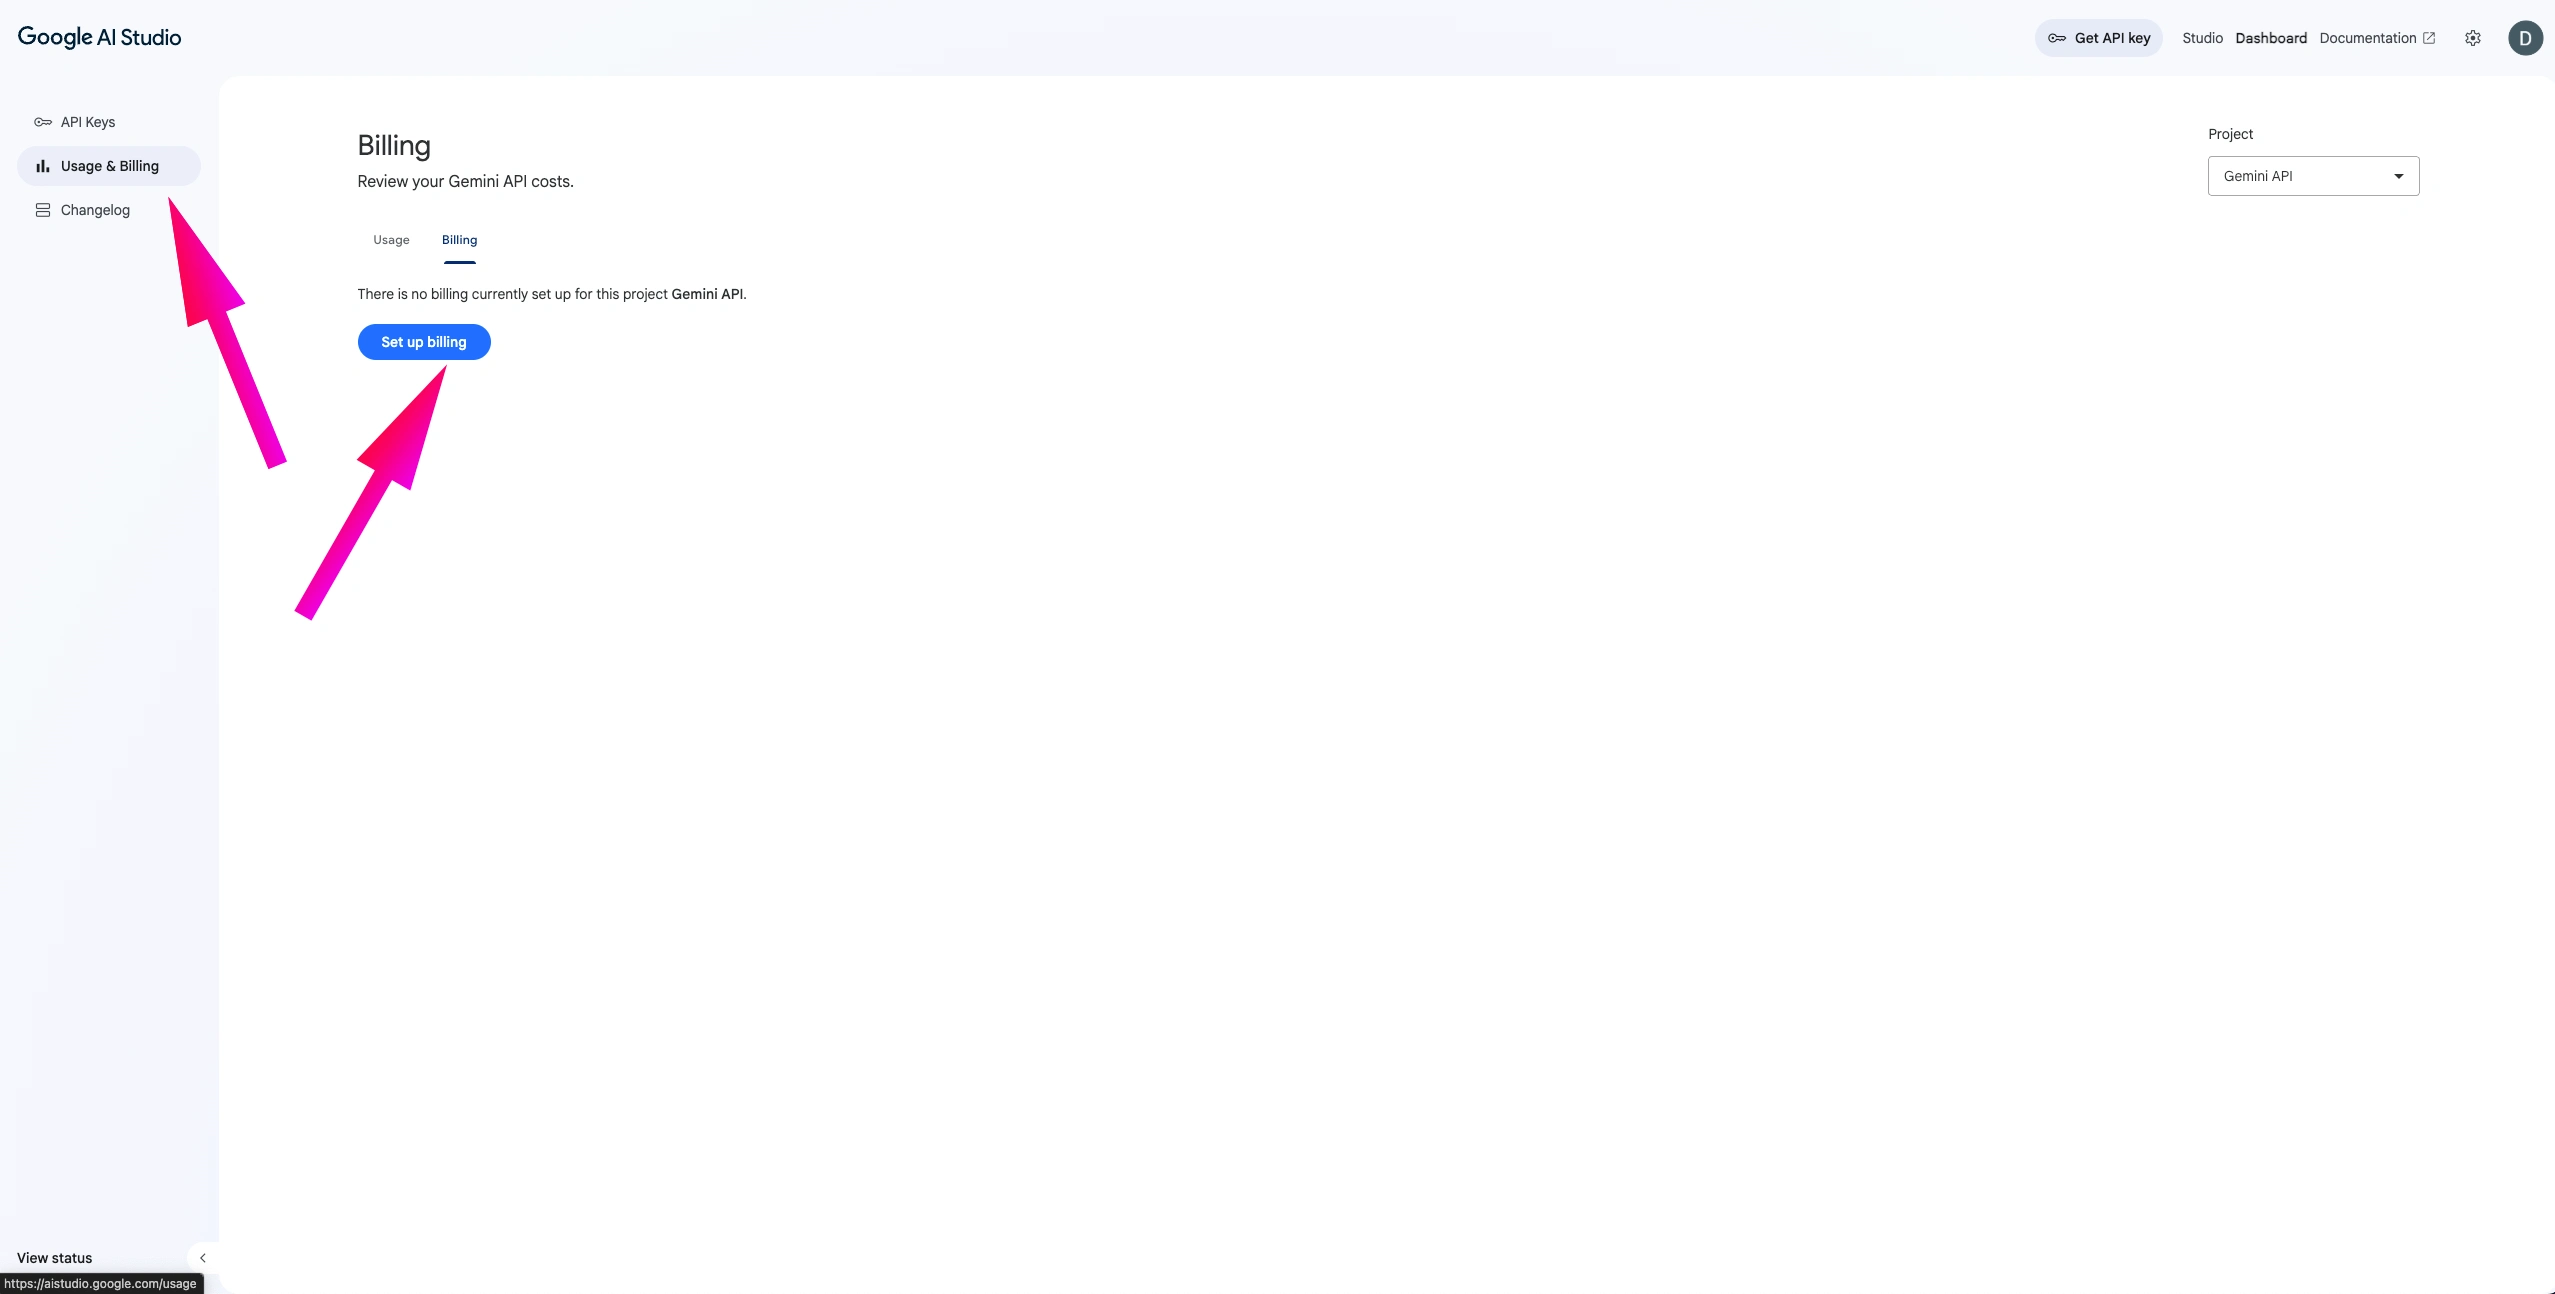
Billing / Google Cloud setup
⚠️ Do NOT Skip This Step!
Without billing enabled, the Gemini API free tier does not work in many countries (including most of Europe). Your chatbot will show an error like:
"The AI assistant is unavailable — the Gemini API free tier is not supported in this region."
You must enable billing on your Google Cloud project to use the Gemini API reliably. Google still offers generous free quotas even with billing enabled, so you likely won't be charged unless you have high traffic.
- Navigate to Billing: In Google AI Studio, go to "Usage & Billing" settings, or visit Google Cloud Billing directly.
- Create or Select a Billing Account: If you're new to Google Cloud, create a billing account. Google often provides free credits for new users. If you already have a billing account, link it to your Gemini API project.
- Enter Payment Information: Add your credit card. Google uses this for billing once you exceed free tier limits or promotional credits.
- Set Up Budget Alerts (Recommended): Create budget alerts to get notified when spending approaches your thresholds. This helps maintain cost control.
💰 Smart Cost Management
Free tier: Google offers generous free quotas — many small chatbots run for free
Gemini Flash: Fastest and cheapest model, great for customer support
Budget alerts: Set alerts at 50%, 80%, and 95% of your budget in Google Cloud
Integrate API Key with Chaterimo
Now connect your Gemini API key with Chaterimo to enable advanced Gemini models in your chatbot. This secure integration allows your customers to experience superior AI-powered support.
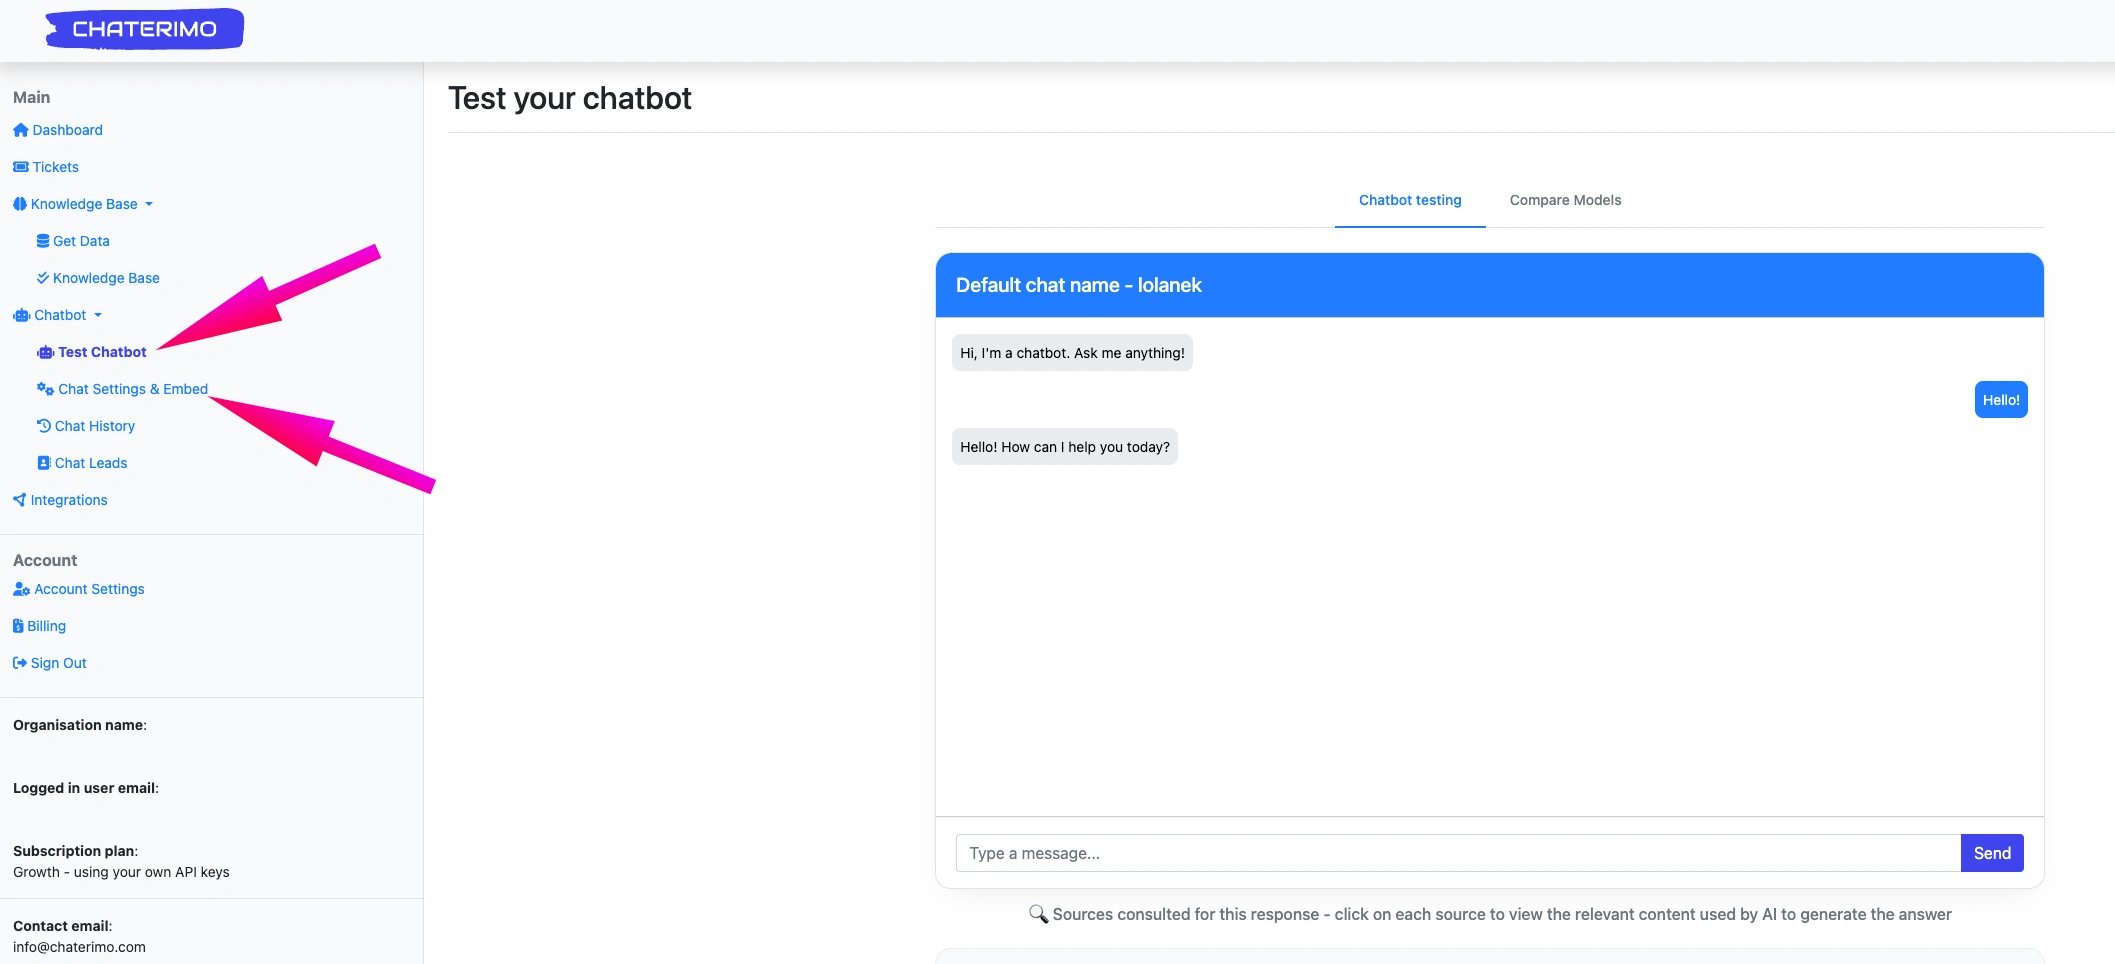
- Access Your Chaterimo Dashboard: Log into your Chaterimo account and navigate to Settings → Chat Settings.
- Locate Gemini API Section: Find the "External AI Providers" or "Gemini API" section in your chat settings.
- Enter Your API Key: Paste your Gemini API key into the designated field. The key will be automatically encrypted and securely stored.
- Select a Gemini Model: Choose your preferred Gemini model (Flash for speed and cost, Pro for maximum quality) in your chatbot's "Chat Settings & Embed" section.
- Save and Test: Click "Save Settings" and test your chatbot. The integration typically activates immediately, but may take up to 15 minutes.
🚀 Optimization Tips
Gemini Flash: Best for high-volume, cost-effective responses
Gemini Pro: Best for complex queries requiring deeper reasoning
Model switching: You can change models anytime without generating new API keys
🔒 Security Note
Chaterimo encrypts your API key using enterprise-grade security. You can update or remove the key anytime from your dashboard. We never store keys in plain text.
FAQ (Google AI Studio, Gemini API key)
Quick answers to common searches like "gemini api key", "google ai studio", and "gemini api billing".
How do I get a Google Gemini API key?
Go to aistudio.google.com, sign in with your Google account, click "Get API key" in the sidebar, then "Create API key". Copy it and store it securely.
Do I need a separate account for Google AI Studio?
No. Google AI Studio uses your existing Google (Gmail) account. Just sign in at aistudio.google.com with your Google credentials.
Is the Gemini API free to use?
Google offers generous free quotas. However, in many regions (including most of Europe), you must enable billing on your Google Cloud project for the API to work, even within the free tier.
How does Gemini API billing work?
Billing is handled through Google Cloud. Enable billing, link it to your AI Studio project, and set budget alerts. You only pay for usage beyond the free quota.
Can I use my Gemini API key with Chaterimo (BYOK)?
Yes. Paste your key into Chaterimo settings and choose a Gemini model (Flash / Pro). This keeps costs transparent because usage is billed directly to your Google account.
🎉 Congratulations! Your Gemini API is Ready
You've successfully set up your Google Gemini API key and integrated it with Chaterimo. Your AI-powered customer support is now operational with Google's cutting-edge AI!
- Advanced Gemini models integrated with your chatbot
- Generous free tier – start without upfront costs
- Enterprise-grade security and reliability from Google
- Real-time customer support with multimodal AI
- Scalable solution that grows with your business needs
- Professional chat analytics and performance monitoring
Ready to maximize your AI chatbot's potential?
🚀 Start Your Chaterimo Trial 🤖 Explore AI Features